Any aspiring photographer would often come across this familiar effect in photo editing; Dispersion. If the phrase is somehow strange to you, not to worry! We are here to guide you on what dispersion effect is all about and how you can utilize Pixlr to achieve it in your images. It goes without saying that your final edited image would look more mind-blowing with the right amount of this effect seeped into it.
What is the dispersion effect?
Admittedly, special effects are not mandatory in the makings of a great photograph. What most photographers can agree though, is that we can use effects to convey a certain narrative within our images. When it comes to dispersion effect, you can use it to create movement or energy flow in your subject, hence producing an intriguing composition.
-
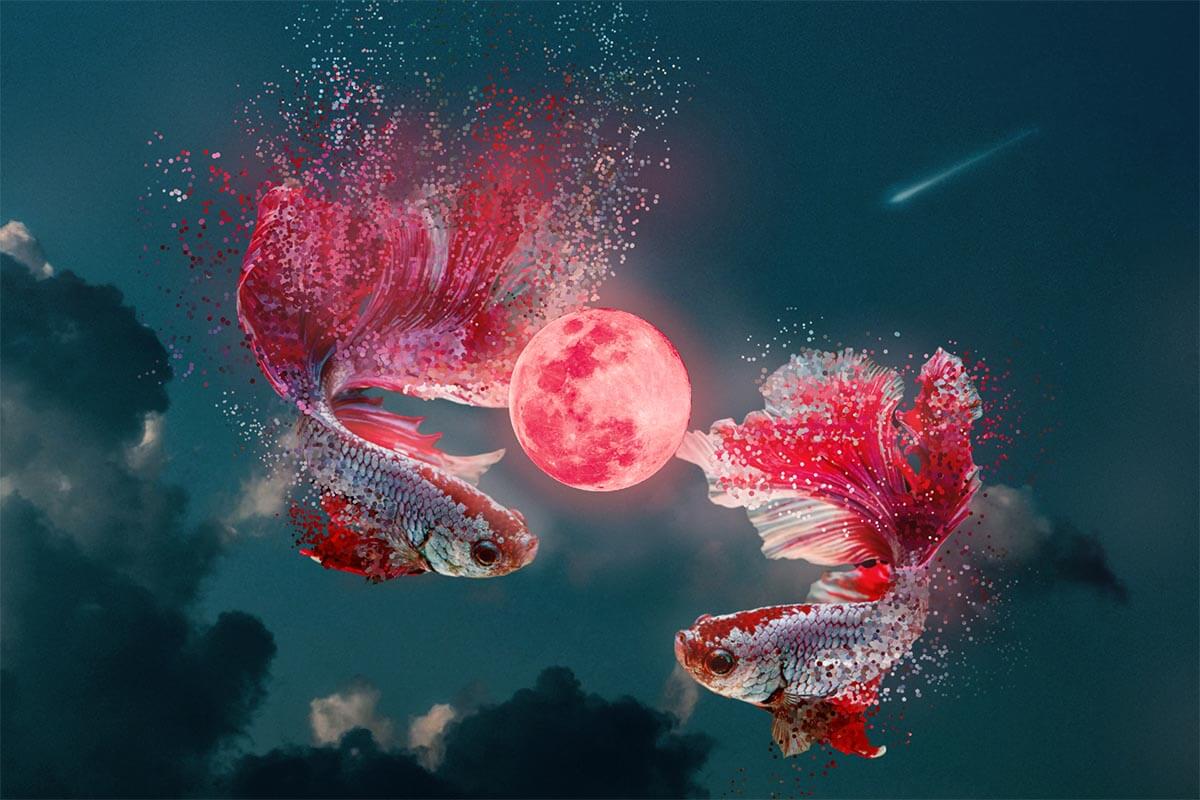
- Stunning visual with dispersion effects. (Source: Pixlr)
Using dispersion, you are also free to experiment with different dynamics and challenge your versatility as a photo editor. It comes with no surprise that this effect has the ability to amplify drama and add flare to your images. Be it for a client or simply for fun (for instance, memeing Thanos’ snap), you can rely on this article to guide you step by step in creating a realistic dispersion effect for your photos.
Why Pixlr?
Using Pixlr’s Dispersion Studio, you can disperse your images with just a few clicks! We understand the importance of practicality for our users, hence we made sure that our interface is built to be as user-friendly as possible. Coupled with our drag-and-drop feature, rest assured that your editing process would be smooth until the very end.
To dramatize your images, here’s what you can do;
Step #1 : Choose the right image
-
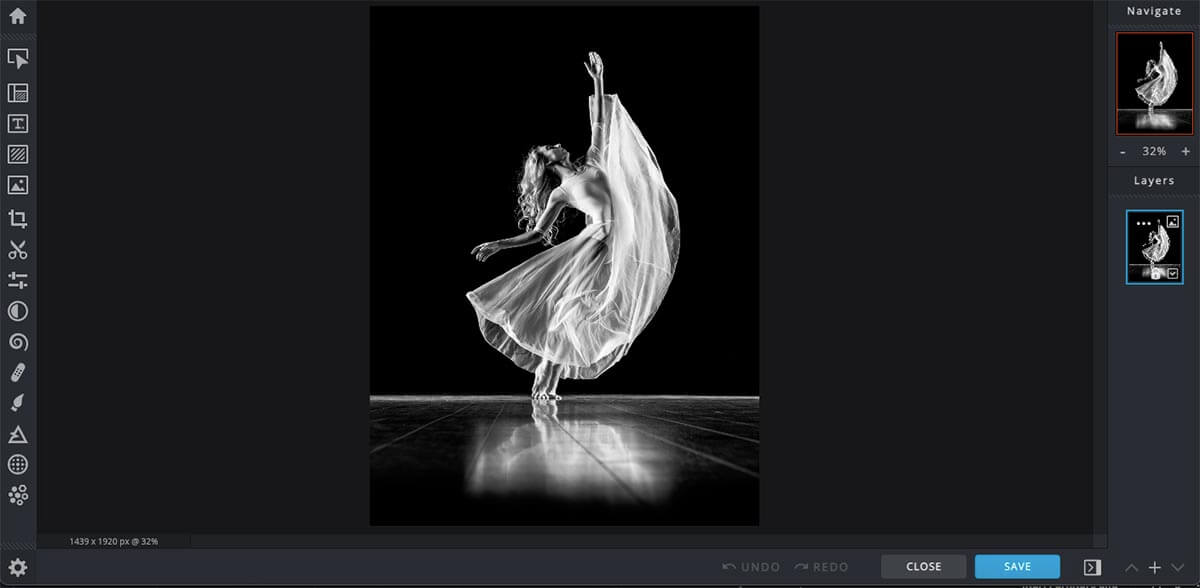
- Example of image selected for editing.
It is advisable to start off with an image that is fairly simple. By simple, we are referring to one that has a plain background, though of course you are free to be as creative as you want with your subject. Once you find one, open up Pixlr X and upload it onto the site by clicking ‘OPEN IMAGE’.
However, if you are short on good photographs, you can opt for selecting one by browsing through our creative library. Here you would be able to find millions of premium stock images for your choosing. Simply upgrade your plan to Creative Pack to get rid of the images’ watermarks.
Step #2 : Head Over to Dispersion Studio
-
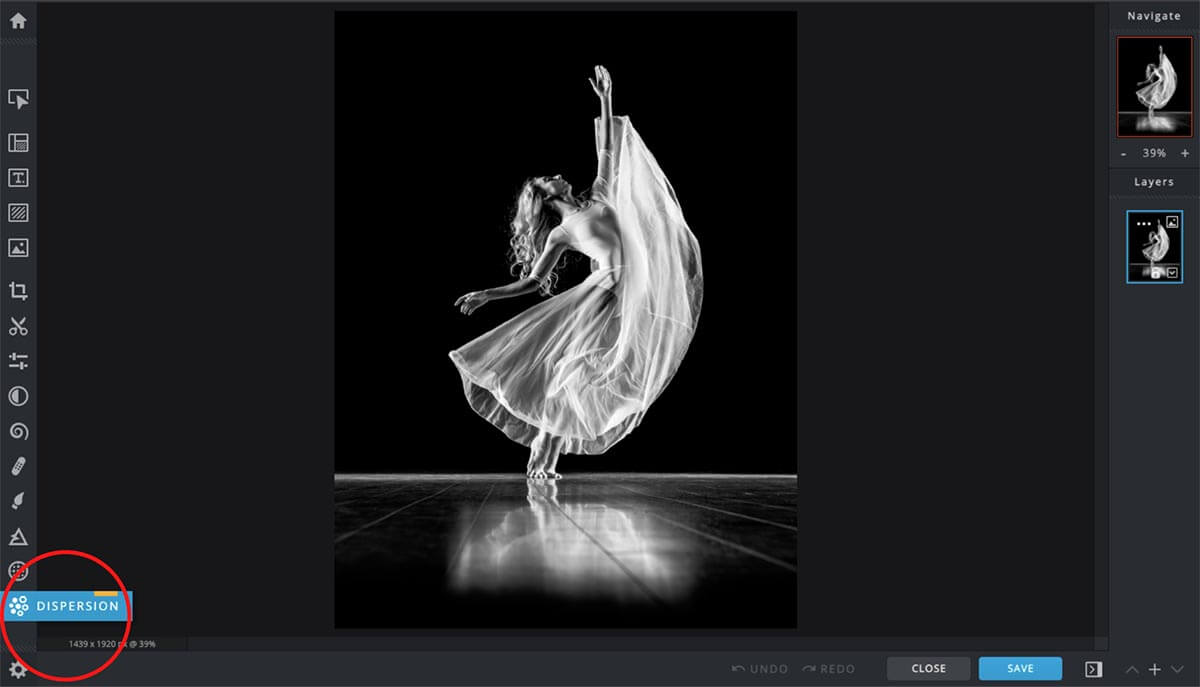
- Location of Pixlr’s Dispersion Studio
Once you have selected an image, you would be directed to the editing page to kickstart your creative process.
Pixlr X is notably known for its intuitive interface, hence rest assured that you would not get overwhelmed with the amount of features it has as they are all arranged neatly in one toolbar (see above). To add a dispersion effect, head to the last icon on the toolbar and click it.
Step #3 : Masking first!
Now that you are in the Dispersion Studio, you will notice that there are two modes available. In order for you to apply the special effect, you would have to select the area you want to disperse using the ‘MASK’ mode. Keep in mind that your brush size is adjustable; simply drag your cursor over the scale to change its size to your liking.
-
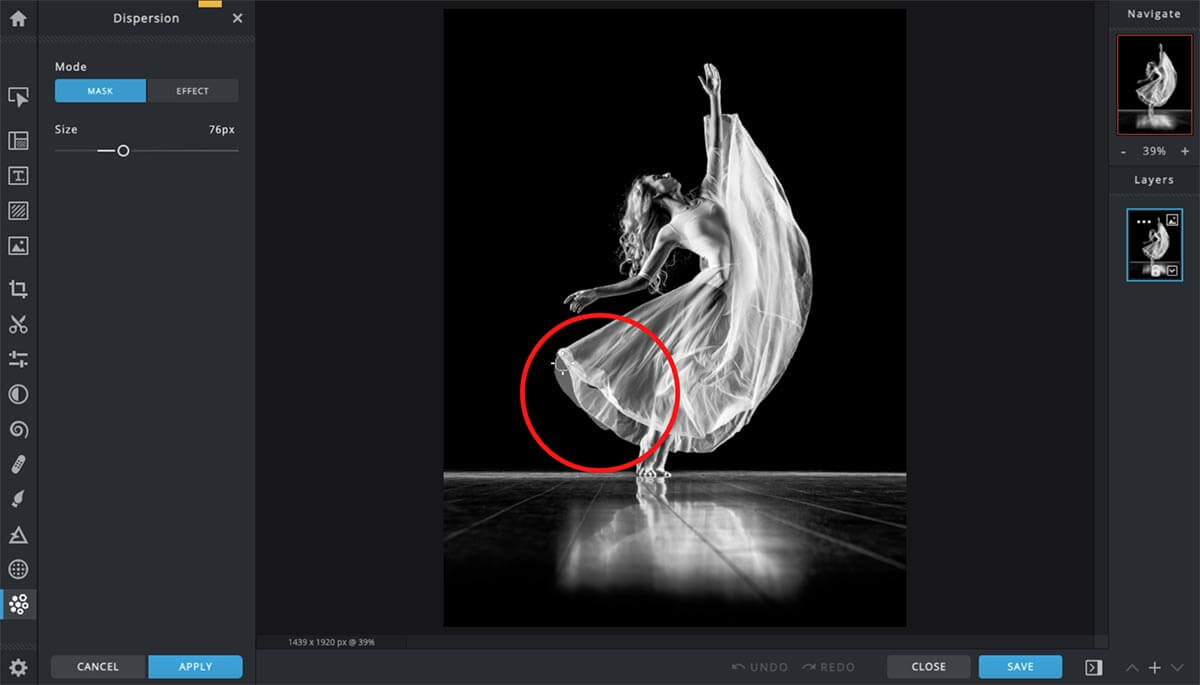
- Masking the area that you would want to apply the effects to.
-
- Instant application of the dispersion effect.
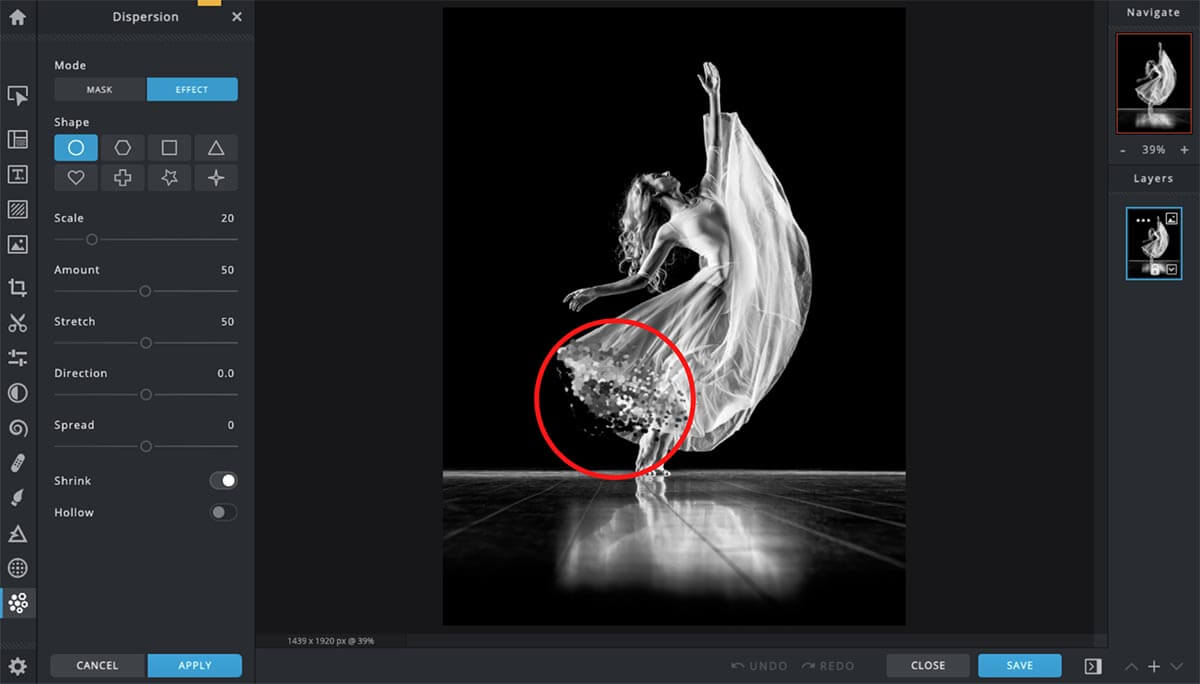
Step #4 : Customize your dispersion
Right after the area is selected, the dispersion effect would be applied instantaneously. The second mode titled ‘Effect’ would then be available for you. In this section, there are a variety of aspects of the special effect that you can adjust to your heart’s content. For instance, the shape of the dispersion is not limited to only circles, but also other geometric shapes.
-
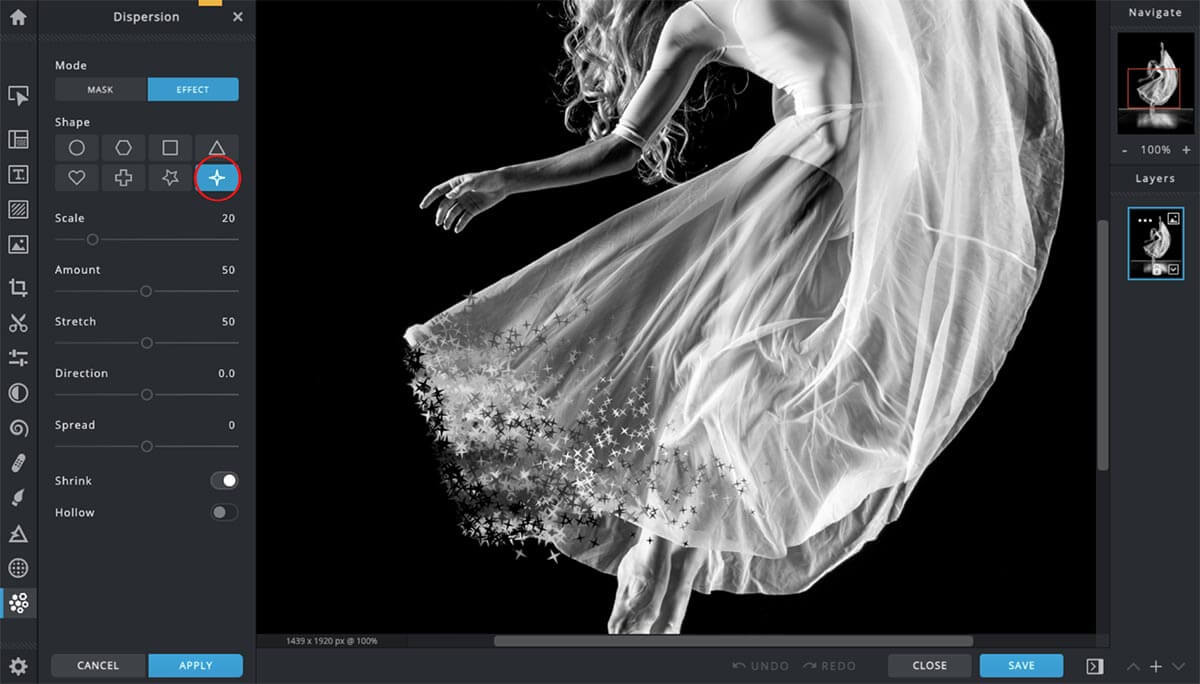
- Selecting different geometric shapes for the dispersion effect. (Source: Pixlr)
-
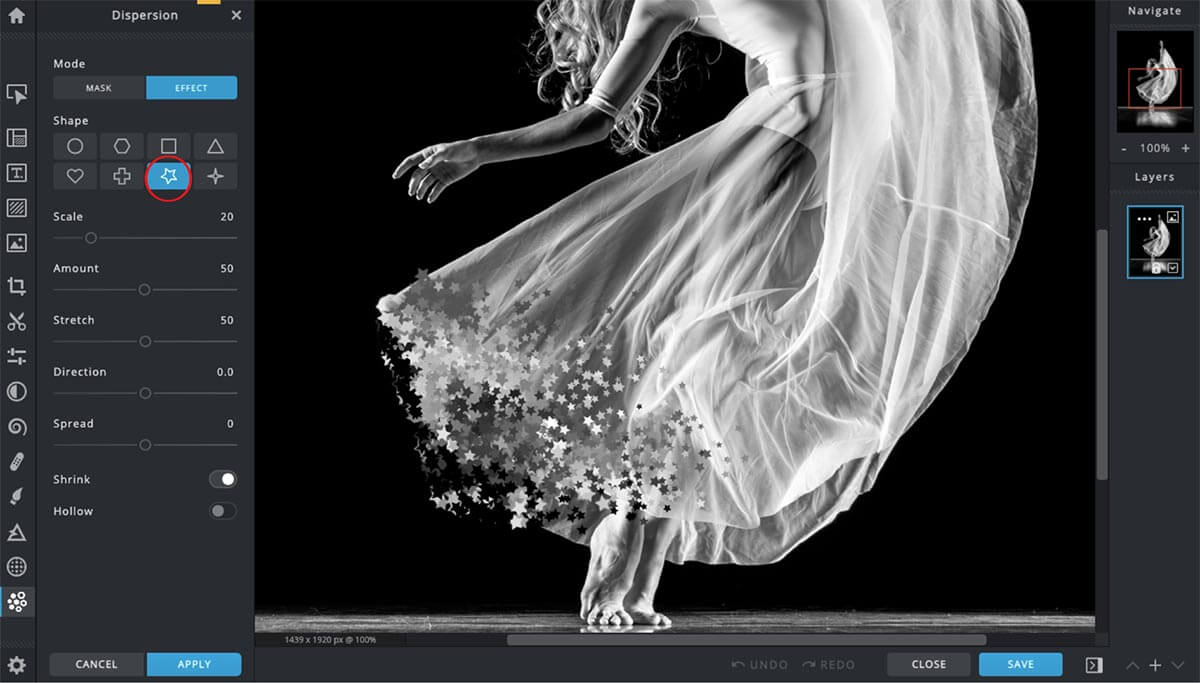
- Selecting different geometric shapes for the dispersion effect. (Source: Pixlr)
To enlarge or minimize the size of the “particles”, you can do so in one smooth motion. All you need to do is adjust the scale or key in the specific number of the size you like. This applies for the rest of the features.
-
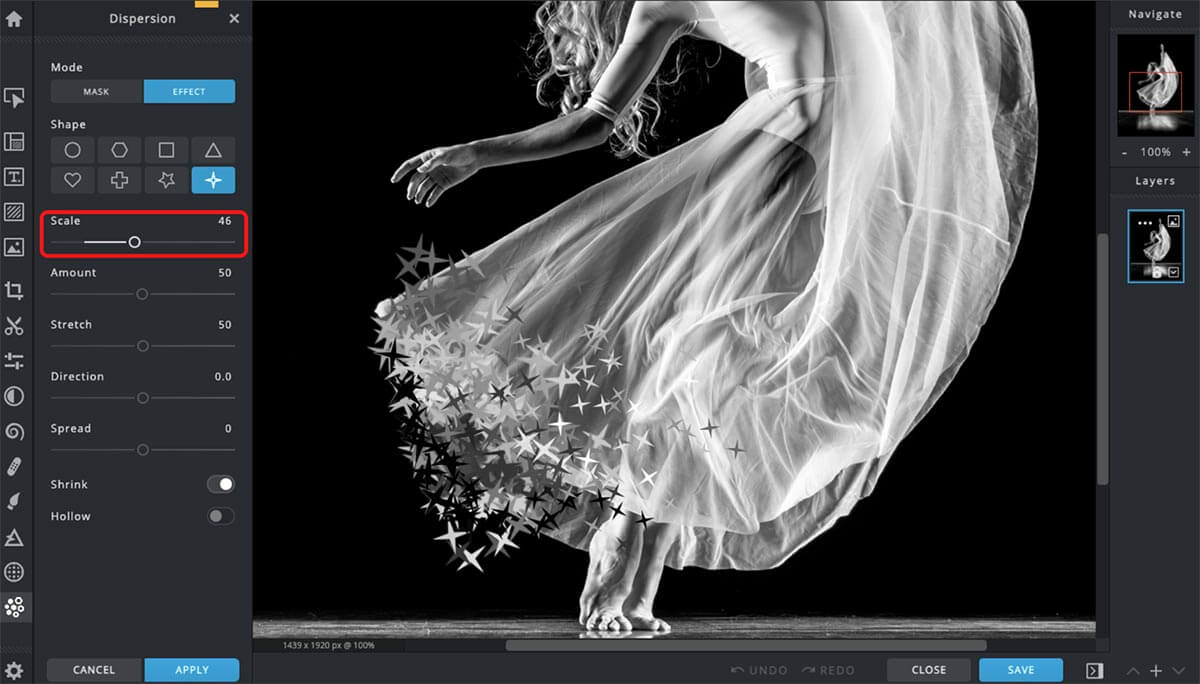
- Adjusting the size of the particles using the ‘Scale’ feature.

Increasing the number of particles can be done under the second adjustment tool which is ‘Amount’.
-
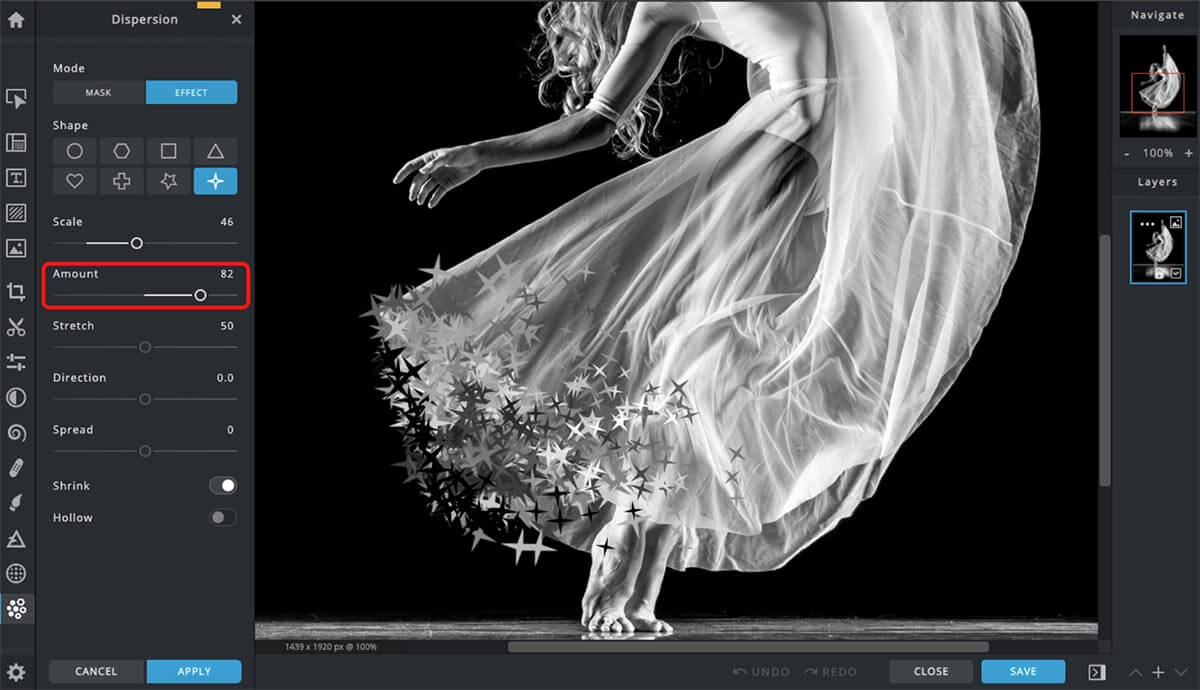
- Utilising the ‘Amount’ tool to control the number of particles in one dispersed area.
Also pretty self-explanatory based on its name, you can head onto the next feature called ‘Stretch’ to change the distance between the dispersed elements.
-
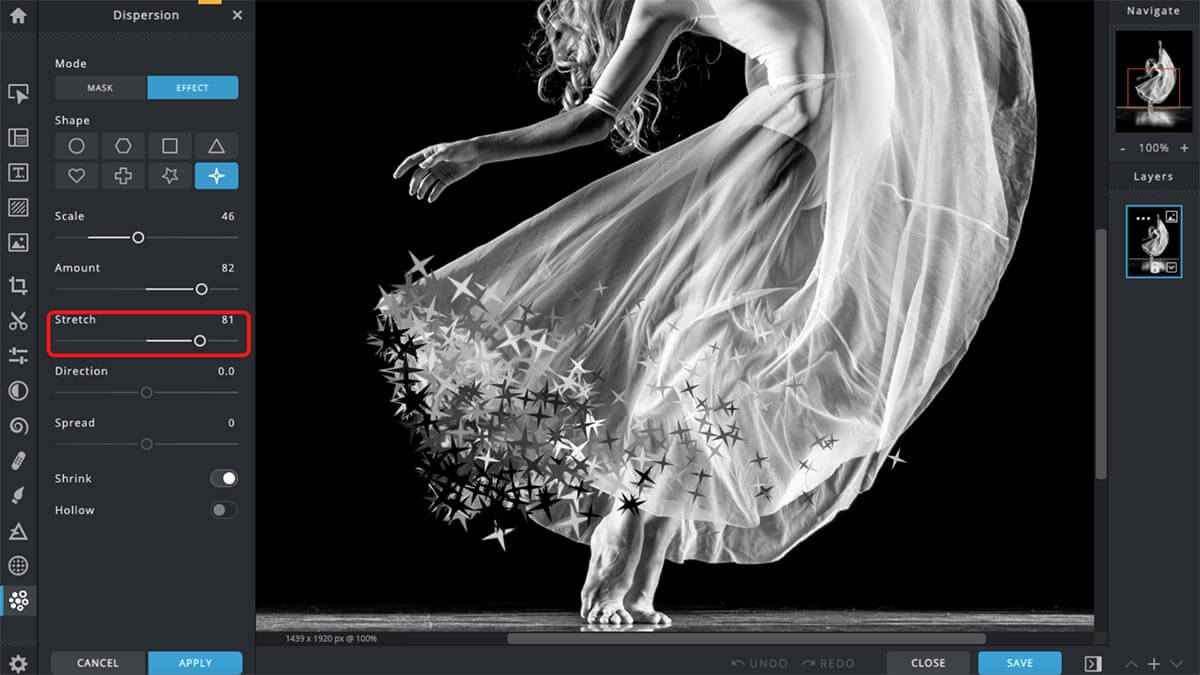
- Changing the distance between particles using the ‘Stretch’ feature.
Next, Pixlr X offers you limitless creative freedom as you gain control on which direction you may want the dispersion effect to be. Putting your cursor along the scale under ‘Direction’ would allow you to have a 360 look on which direction the dispersion effect would be pointing to.
-
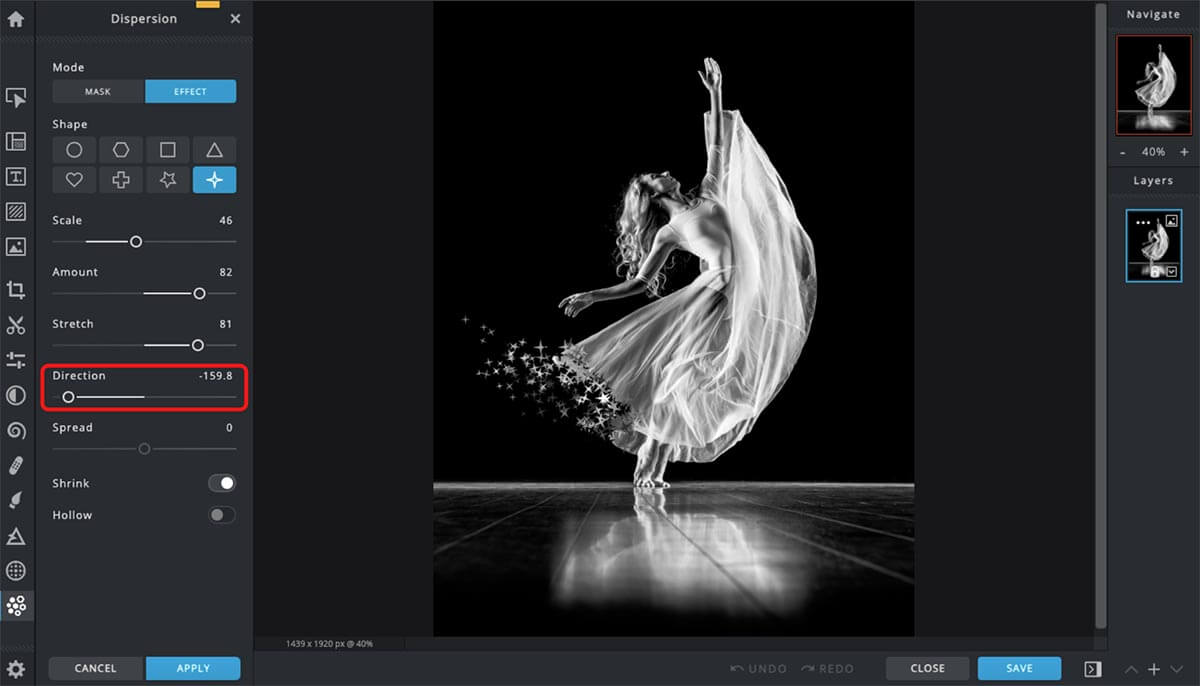
- Arranging the direction of the effect.
You also have the access to adjust the overall shape of your dispersion effect using the adjustment tool, ‘Spread’.
-
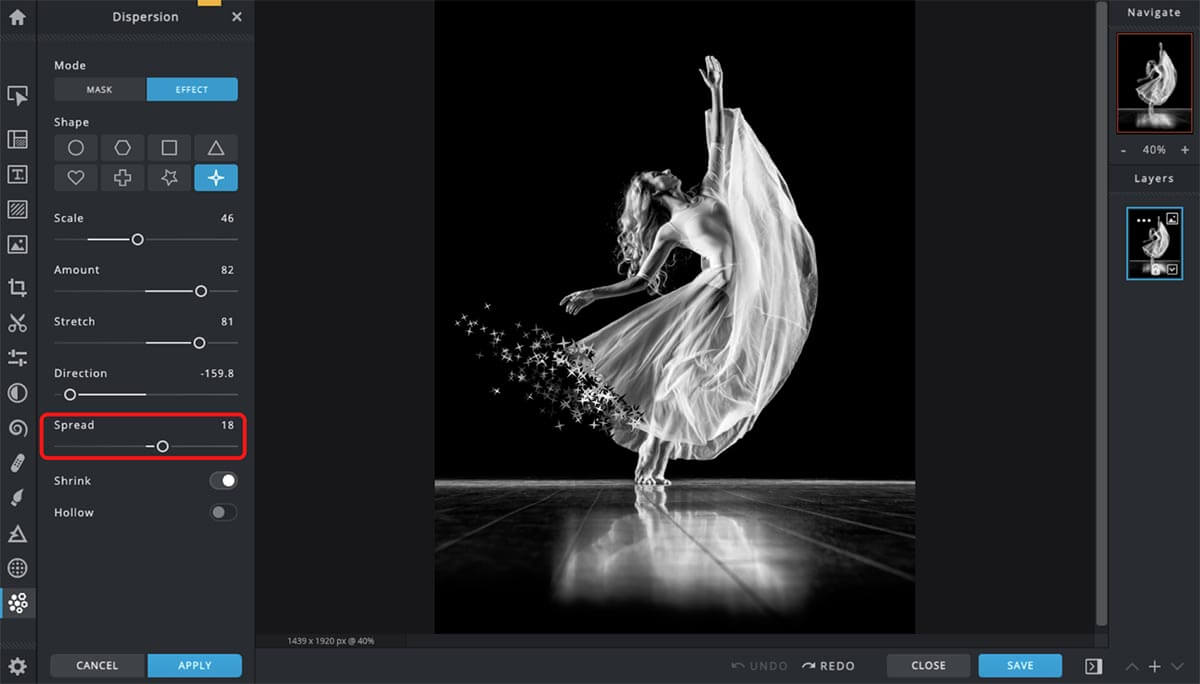
- Changing the shape of the dispersed area using the ‘Spread’ tool.
The last two tools have an on and off toggle instead of the scale arrangement that the previous ones have. To put it simply, ‘Shrink’ allows you to compress all the dispersed articles, whereas if you want to magnify the outlines of your particles, you can click on ‘Hollow’.
-
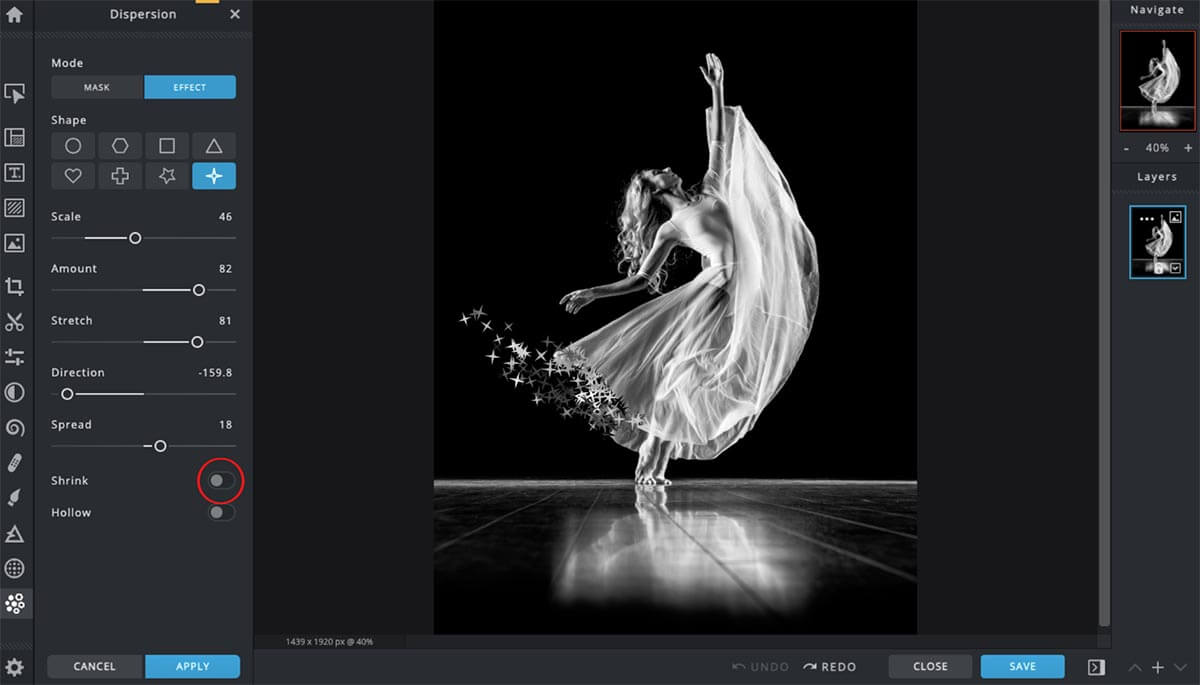
- Differences of how the dispersed effect would look like using the ‘Shrink’ tool.
-
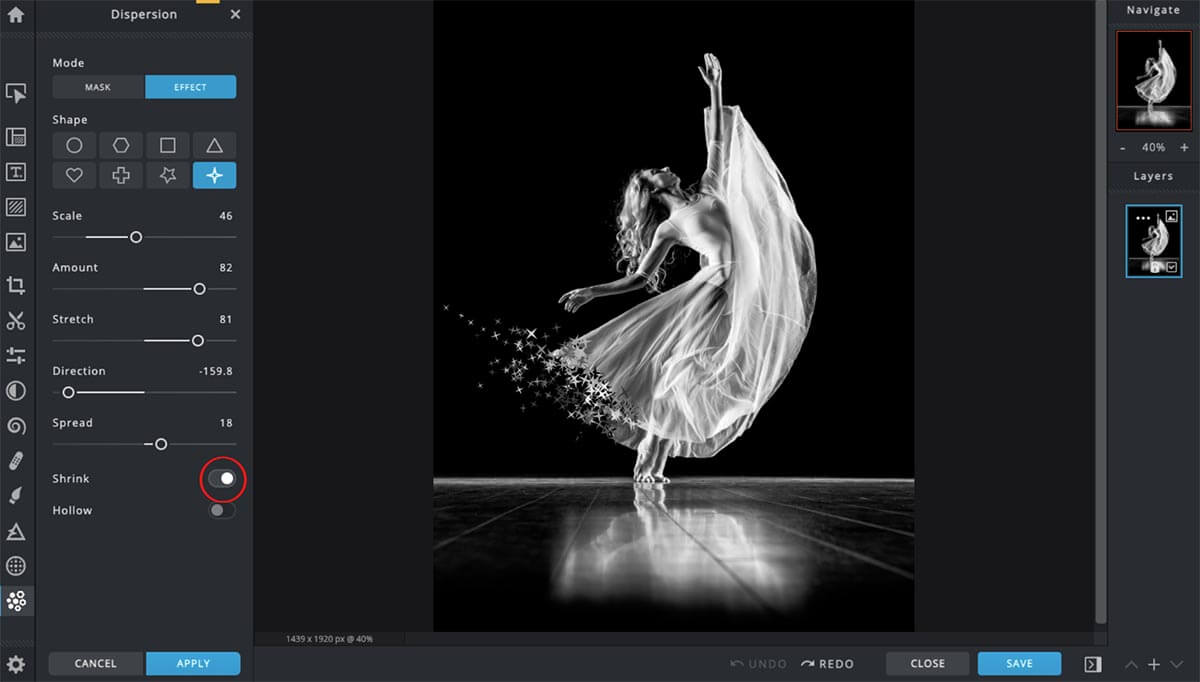
- Differences of how the dispersed effect would look like using the ‘Shrink’ tool.
-
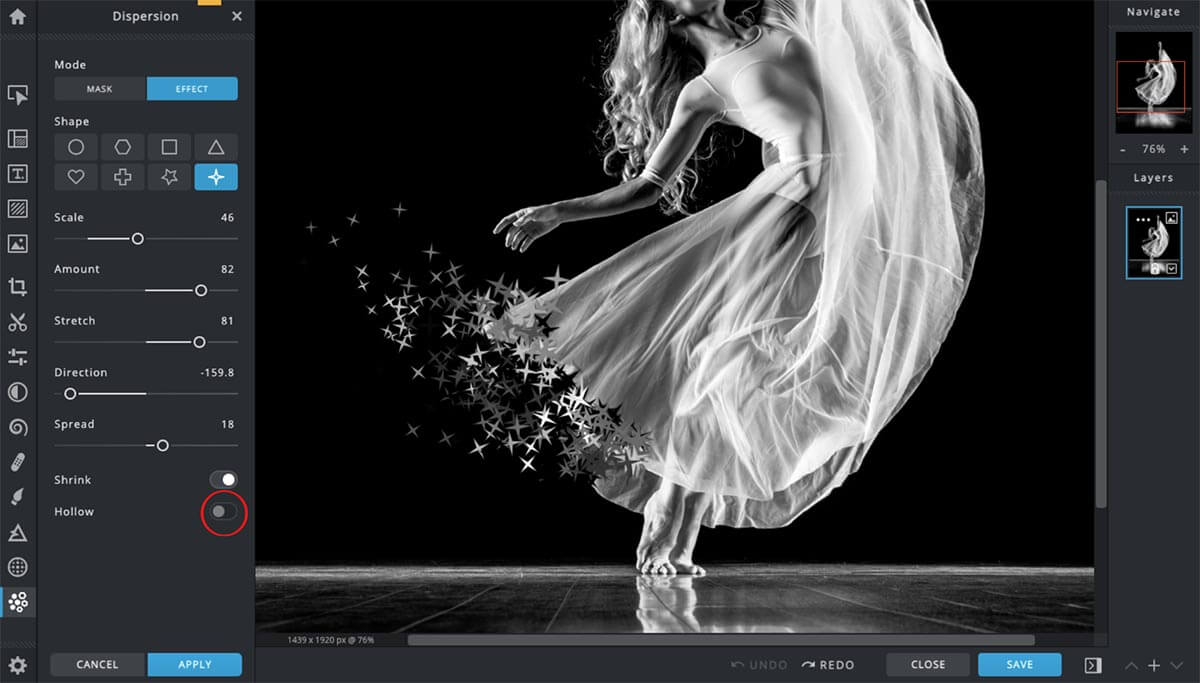
- Differences of how the dispersed effect would look like using the ‘Hollow’ feature.
-
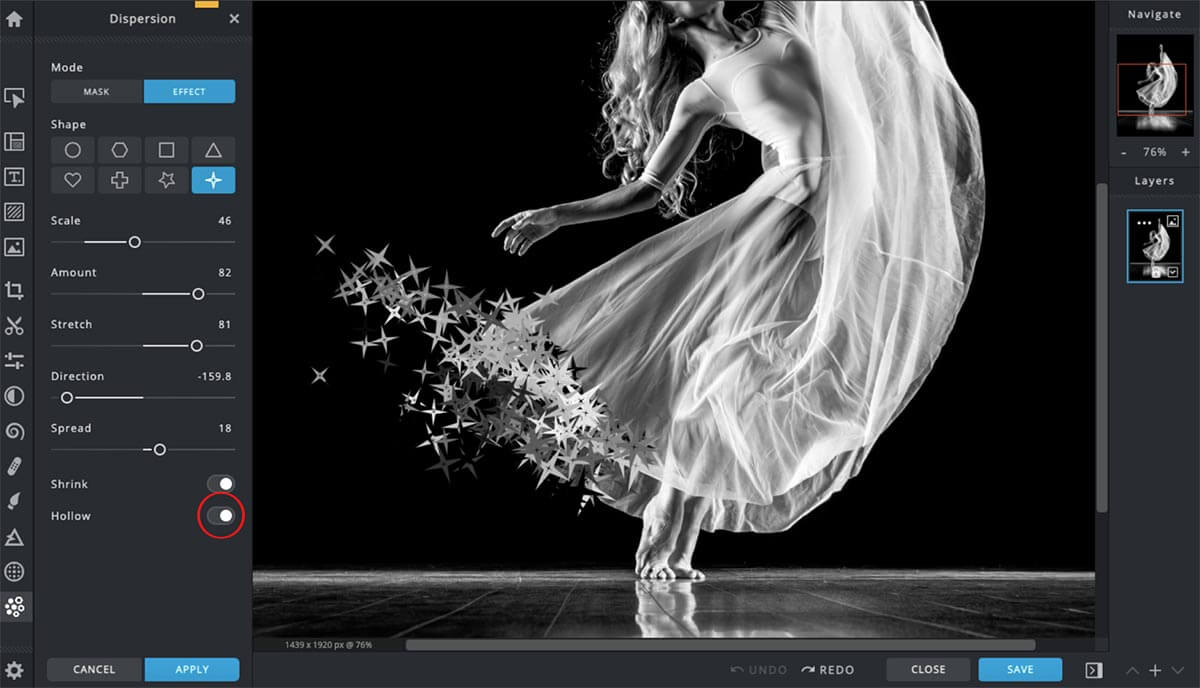
- Differences of how the dispersed effect would look like using the ‘Hollow’ feature.
Once you are satisfied with this particular area, you are free to mask other sections of your subject and the same adjustments would be automatically applied to them. Your final image may end up looking something like this (see below).
-
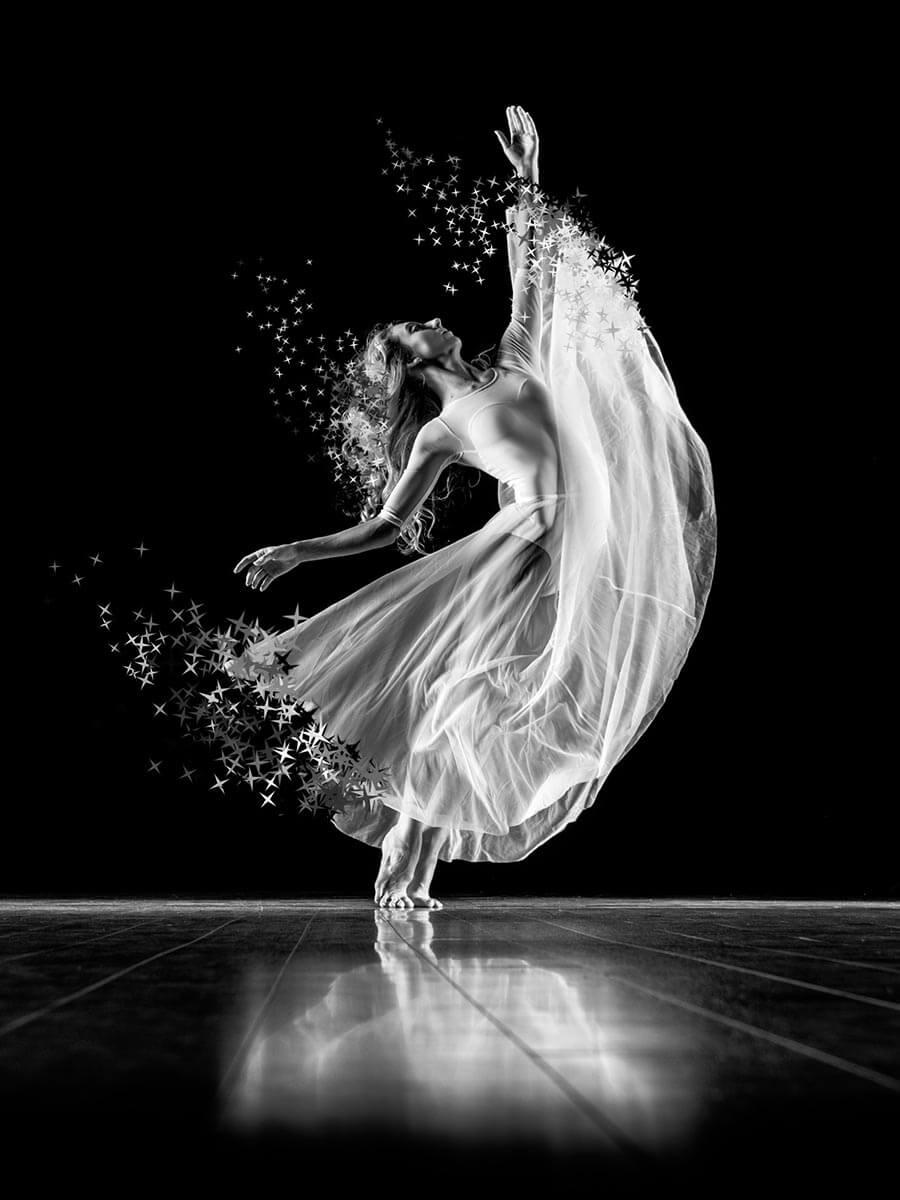
- Final version of the edited image.
With merely four steps, you can achieve the trendy cinematic effect that is guaranteed to make your images POP. It is without a doubt that by using the dispersion effect, the pose and motion of your subject can be amplified significantly, hence creating a striking composition that for sure will not leave your audience’s mind any time soon.
Article written by Annisa Sharfina Akhmad