Reflections give us a different perspective of looking at the same photo, it’s refreshing. If you’ve ever turned your head upside down to look at things differently, you know what we’re talking about. Images edited to look like reflections can vary. Some edits are simple, while some look otherworldly to the point where it leaves you dumbfounded.
Creating reflections is something that looks complicated to achieve at first, but is actually quite easy! Especially with Pixlr E’s new Creative filter named Reflect, it’s just clicking a few buttons and you’re all set. No long hours on Photoshop.
We came up with a super easy guide on how to do exactly that.
Without further ado, let’s jump into the tutorial:
Step #1: Select Your Filter
After you’ve uploaded your chosen image on Pixlr E, click on Filter. The Filter option can be found on the top bar. Next, screen through the options, then click on Creative.
Now, hover your cursor over to Reflect and click on it. That’s the filter we will be using for this tutorial.

Step #2: Choose Your Type
From here, you’ll be met with multiple options of reflections to choose from. You will also see a slider to adjust how Horizontal or Vertical you prefer. The adjustment sliders will be at a default of 50%.
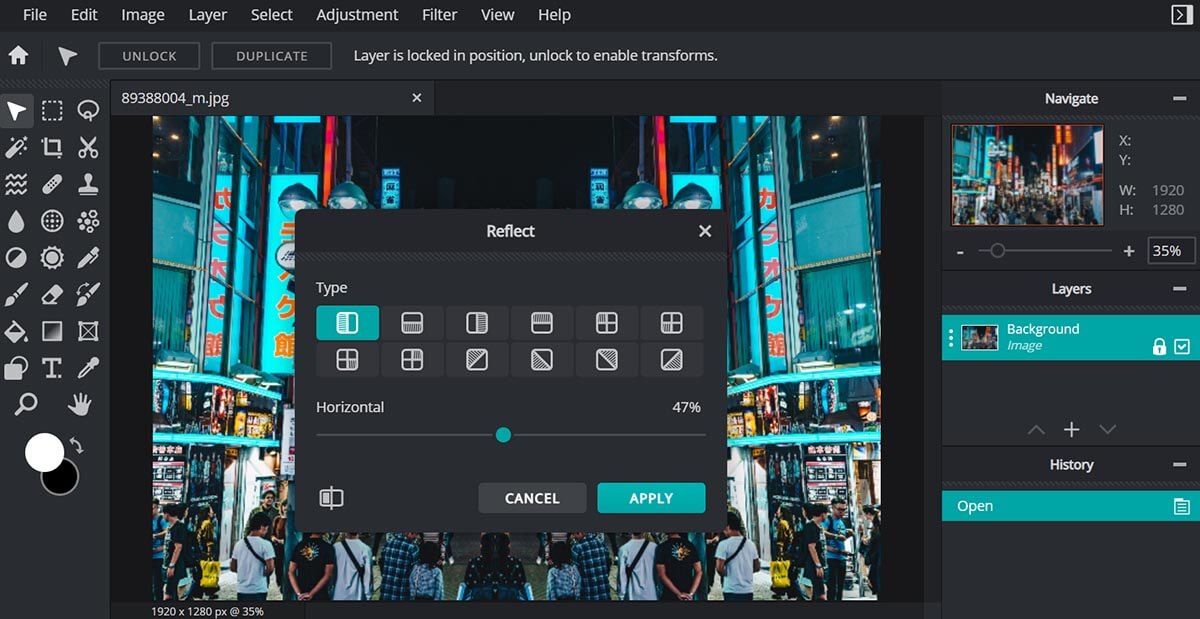
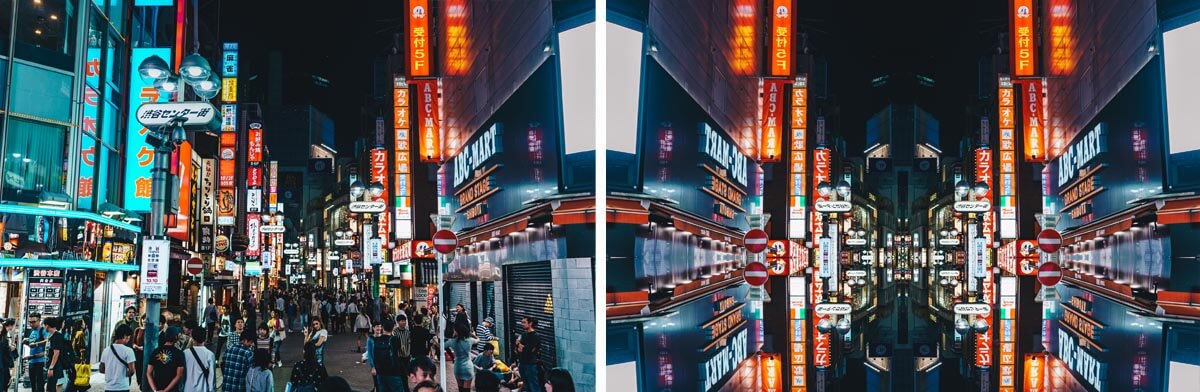
Each option gives a different result. For example, the first and third option on the upper row both creates a horizontal inverted reflection, but using different parts of the same photo.
For example:
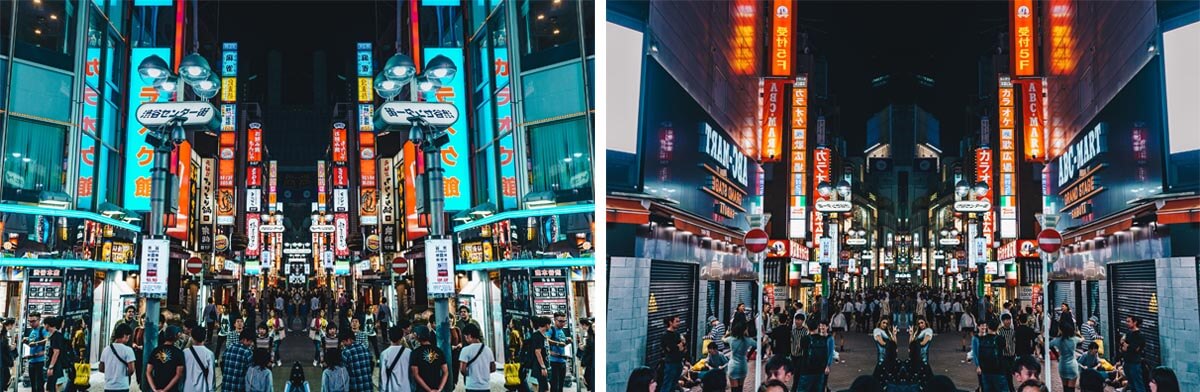
The photo on the left used the first option, while the photo on the right used the third option.
See the differences between the two? Although the icons are similar, the results are quite drastic. It was created without adjusting any of the sliders. (Horizontal at 50%)

So play around with the different types of reflections for cool outcomes!
We decided to create the feel of a quiet night in Tokyo city, with reflections to create an illusion of a mirror on the ground.
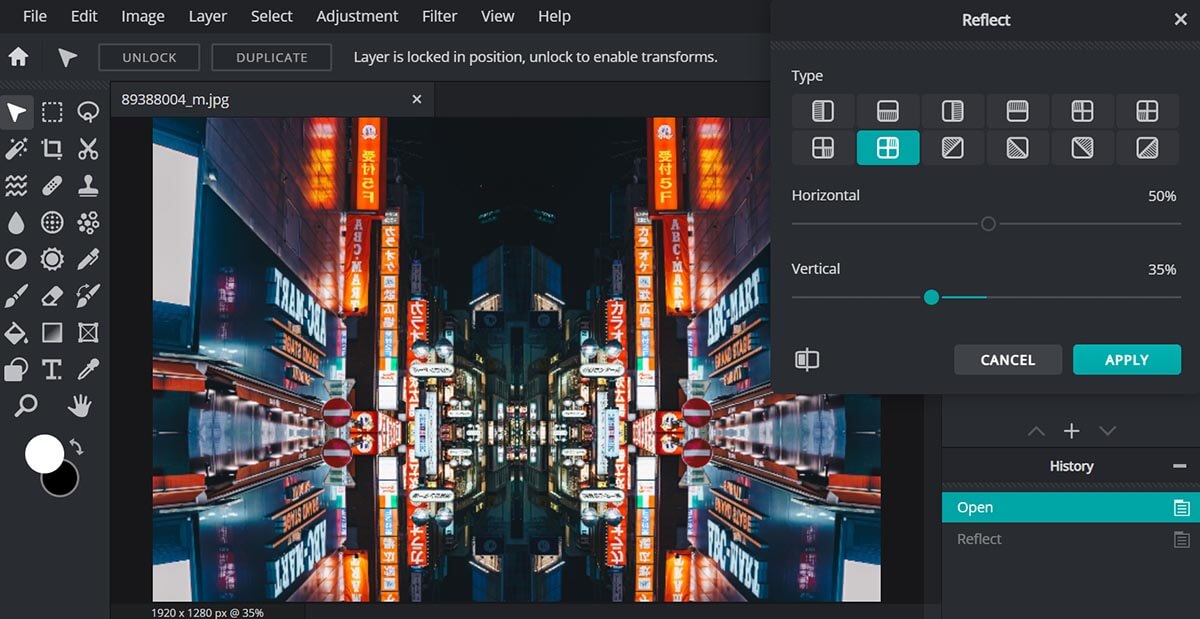
For the edit, we chose the second option on the bottom row, and adjusted the Vertical slider to 35%.
So depending on the style you’re going for, you might be using another type of reflection.
When you’re satisfied, hit Apply.
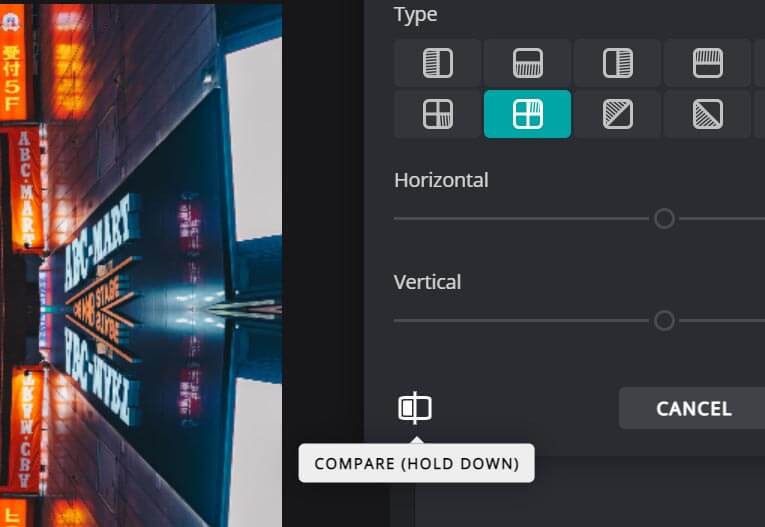
Tip: You can always compare the before and after by clicking on this handy-dandy button here.
Step #3: Make Further Edits
Now that you’ve edited your photo with the Reflect filter, it’s time to make any further edits in Pixlr E before saving it. Enhance it even more by using your favourite Pixlr E tools.
Touch up your photos (adjusting the colors etc) before saving it.
Step #4: Save and Share It
Quick and definitely easier than you thought, isn’t it? Once you’re done with everything, it’s time to save and share it.
Here’s our quick before and after:
With that quick edit, we’ve turned a regular busy cyberpunk-esque landscape into a considerably quiet night in town.
What do you think? We hope this tutorial was helpful for you in navigating through the Reflect filter!
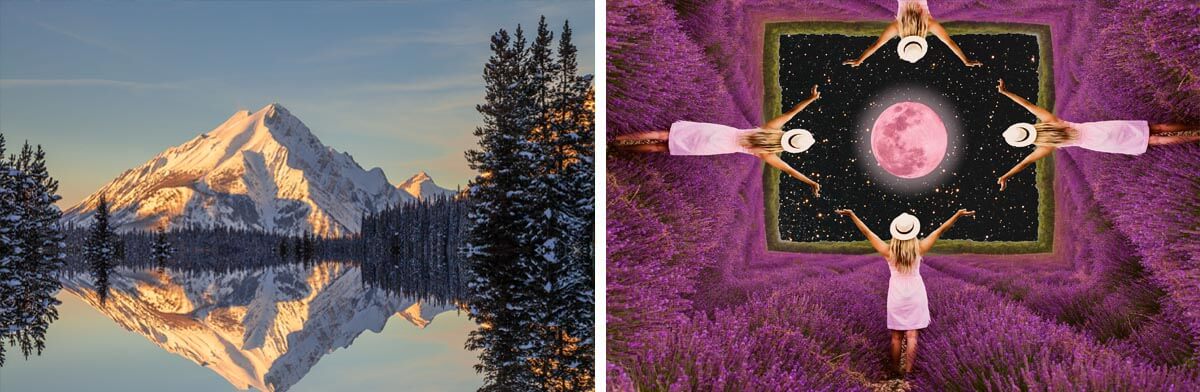
There are so many different styles you can achieve with our new Reflect filter. It’s all about perspective!
Here are some examples below!
Start your own edit right now at Pixlr E
Article written by Ashley Yeong