Today, we’re going to show you how to make a double exposure silhouette using Pixlr Editor. We’ll start with the basics of the technique and then give you some more advanced tips and tricks.
Double exposure photos are cool. In the days of 35-mm film, these magical-looking images were one of the neatest tricks a photographer could pull off. It wasn’t easy, though. It took a lot of forethought and planning and trial and error in the darkroom to get these otherworldly, surreal photos to line up to perfection.
These days it’s relatively easy to create a double exposure image. But it still takes some skill and a bit of an artistic eye to create a superior one. Luckily, all of us have an artistic eye. We just have to focus it and spend a little time on our work. Double luckily: We all have access to free tools like Pixlr Editor.
Step 1: Start with a silhouette
Just because you can place two images together doesn’t mean they’ll look awesome as a double exposure. In general, you’ll see the most success if your “main photo” is a full silhouette, a near silhouette, or an underexposed portrait. You can go digging one up on the Internet or you can take a portrait you may already have and underexpose it or darken it in various ways. Open your silhouette image in Pixlr Editor. This will be your main image.
Step 2: Add a secondary image
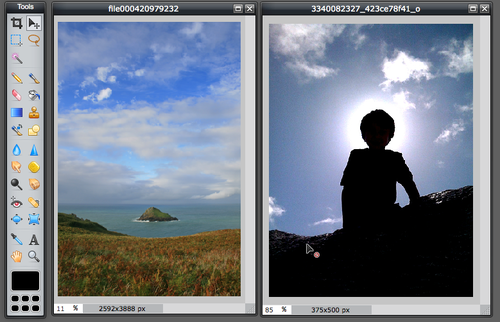
Open your secondary image in Pixlr Editor. (You may want to resize it so it is about the same size as the main image.) Choose “Select all” and then “Copy” from the Edit menu. Paste this secondary image into the main image. You now have one canvas with two layers. Unlock the background layer by double clicking on the lock icon. You will need to be able to edit and/or move around both layers during this process.
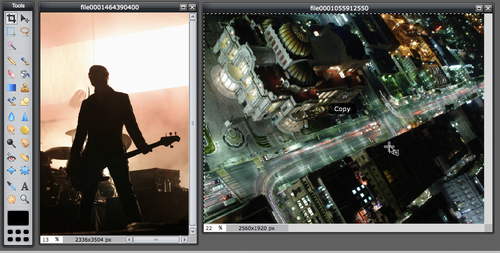
Tip: For your secondary image, a nature-oriented photo or one with a pattern should work well. Some great images to try include trees or tree limbs, flowers or foliage, cityscapes, and cloudy skies.
Step 3: Adjust layer settings of secondary image
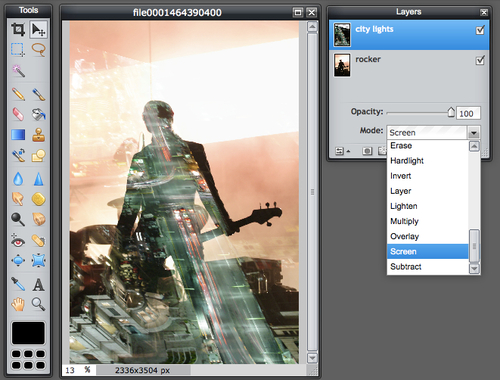
Select the nature-oriented layer and play around with the layer settings. You have a lot of choices here, but the two best bets for this technique are the “Screen” and “Lighten” blending modes. Experiment with these until you find one that works best. If your images are incredibly compatible, you might only need to adjust the opacity of your images and not even bother with the layer settings. But chances are adjusting these layer settings are going to give you the best results.
Tip: Your silhouette photo doesn’t need a blending mode like screen or lighten. It’s your “base” for this exercise, so leave it underneath your nature-oriented photo with a “Normal” layer setting. You can alter it in other ways, but it probably won’t need a different layer setting.
Step 4: Make any additional adjustments
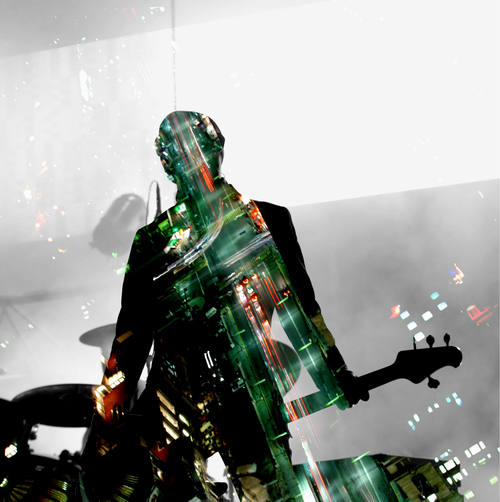
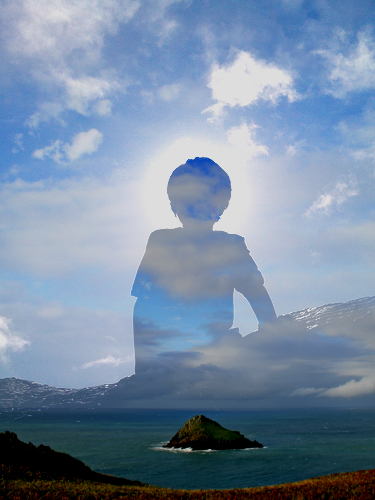
The real skill here is in being patient and open to experimentation. You might want to adjust the opacity of your main layer. Bumping up the contrast of a layer (Adjustment > Brightness & Contrast) can make a difference. Turn down the saturation of a layer completely if you want to see how a layer looks in black and white (Adjustment > Hue & Saturation). Once you’re done, collapse all of your layers into one (Layer > Flatten image) and take a look. You may find that adjusting the contrast and lightness one more time may be the winning detail. Here’s what my final product looks like:
Getting advanced with this technique
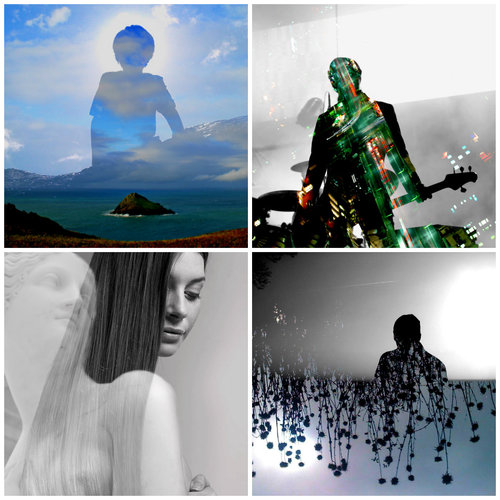
Once you have that basic technique mastered, you’ll want to dig in and try a few other things. Here are some examples of silhouette double exposures I created and what I did to make them different.
MOVE THINGS AROUND
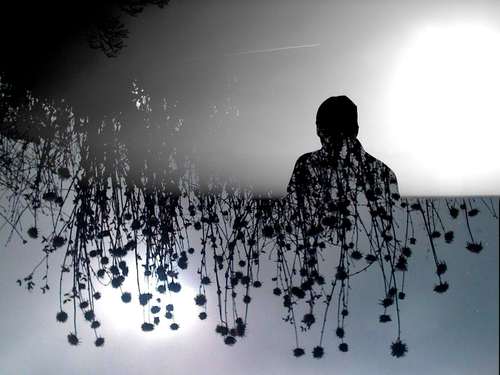
You’re really getting creative here, so don’t be bound by 90-degree angles. Use the “Free Transform” tool in the Edit menu to rotate or resize one of the images. Try rotating one of the layers and see if you can get a neat effect. Move the layers around until you start to see details line up or play off each other. I wasn’t getting any exciting effects with this double exposure image of a guy walking in harsh light and a field of wildflowers until I rotated the secondary image of wildflowers into a full upside-down position. Now, it’s much more intriguing:
COLOR VS. BLACK AND WHITE
The effect works best when the light and dark areas of each of your photos play off each other, which is why black and white photos work great. Try it with your silhouette as a black-and-white photo and with your secondary photo in full color. It might look cooler that way. Or, just knock out all the color by lowering the saturation of each layer. Or, do like I did here and use two images that have similar colors. I saturated the heck out of the main layer to make this blue sky crazy blue:
IMPARTING MEANING
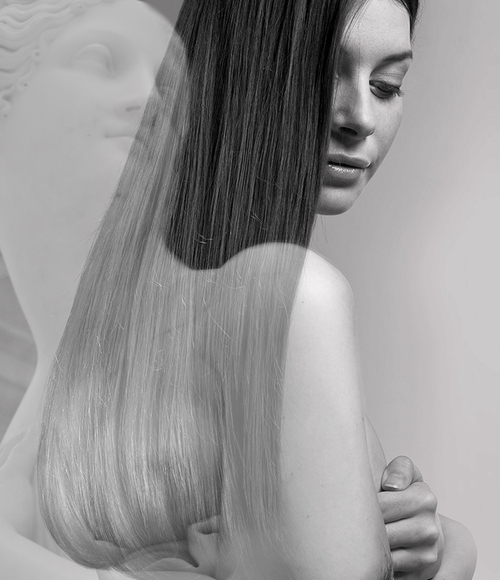
People will probably look for meaning in your double exposure. So consider your image choices carefully. You’re combining/juxtaposing two images and forcing some sort of relationship onto the resulting photo. It may make sense to take a photo of a glacier and contrast it with an image of burning fire. Or, as I did here, take a picture of a beautiful woman and combine it with a photo of a beautiful Roman goddess to play off of likeness. It’s technically not a silhouette, but it’s an example of how nearly any two photos can be combined as a double exposure.
Of course, not every work of art needs to have meaning attached to it. Looking interesting is usually good enough, and you can make some very interesting double exposure silhouettes using Pixlr Editor.
It’s much easier than you might think, so give it a go and share what you make with us on Twitter or in our Pixlr on Flickr group. We’re always excited to see what people are making with Pixlr apps.