Pixlr Express has a Color Splash option that makes it easy to transform a photo into black and white with areas of color shining through, but you can do this in a more thorough and detailed way in Pixlr Editor. To distinguish between the two processes, we generally think of the more advanced Pixlr Editor process as one of “selective color” rather than “color splash.”
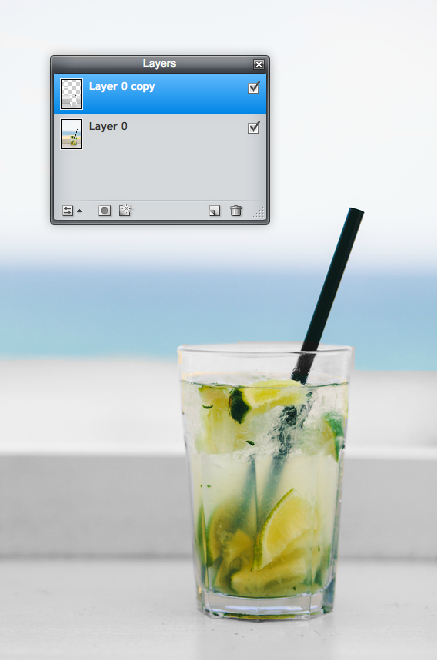
Stacking layers and erasing one layer
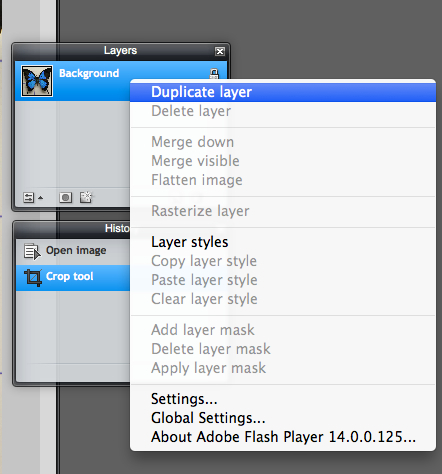
The general idea is to double up your layers and then erase part of one layer so that the bottom layer shines through. First, open your image in Pixlr Editor. Then, duplicate the background layer, which you can do by right clicking on the layer itself in your Layers toolbar. Or, look for the Duplicate layer option in the Layers top menu.
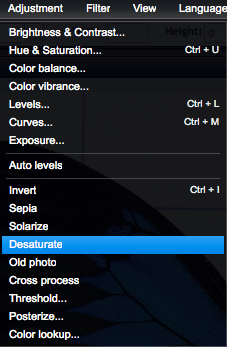
Next, simply use the Desaturate option in the Adjustments menu to turn your top (duplicate) layer into a black and white image.
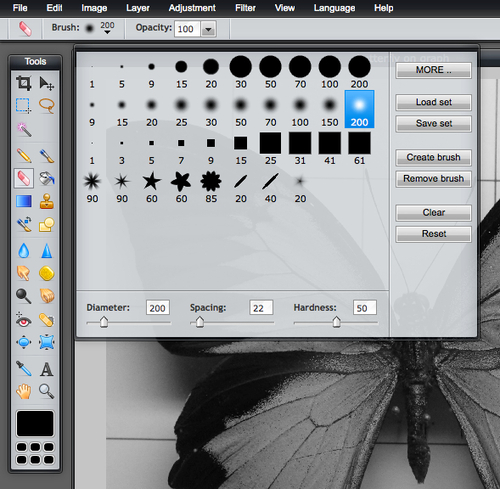
Now, you’re going to simply use the Eraser tool to erase the areas that you want to show up as color. You’ll be erasing the top (duplicate) layer in specific areas with the Eraser, and the Eraser works as a brush. So, choose the best brush tool for the job. If you need to do detail work, consider using a soft brush and increase the hardness. You can also create your own brush if you want.
This image has a fairly clear area we want to color, but if you are working on a more detailed area, try starting with a large brush and working your way to a smaller brush to work on the edging.

That’s it. It’s quite easy once you know how it works. Basically, you create a color and black-and-white layer, stack the black-and-white layer on top, and erase the areas where you want color to shine through. Easy!