Attracting over 55 million users per month, it’s no surprise if Roblox’s massive popularity has caught your attention. If you are looking for a complete guide on how to design your avatar’s clothing, you have come to the right place! Having been nominated as the most frequently used site for photo editing, Pixlr is the perfect platform for you to aid your creative journey. Read more below as we give you a step-by-step tutorial on creating the perfect roblox shirts and pants.
Step #1: Download the Roblox shirt and pants templates
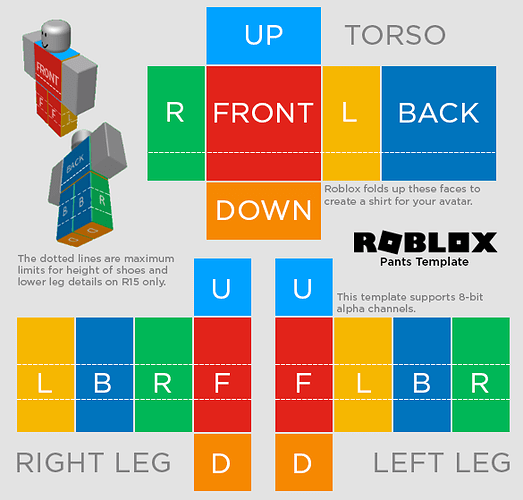
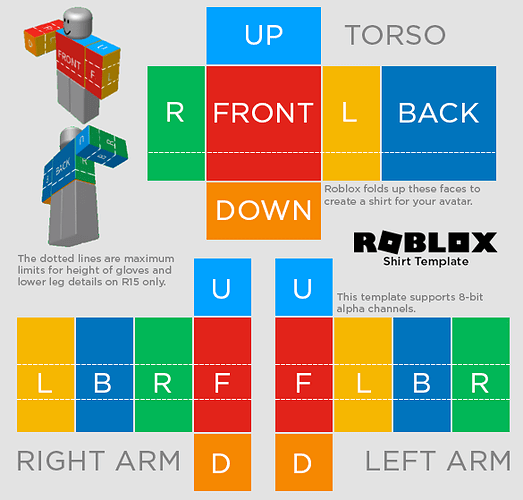
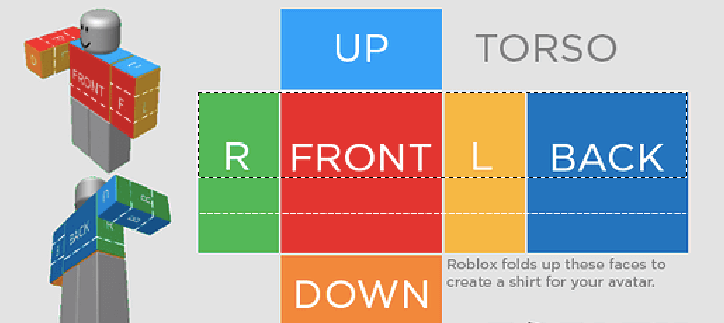
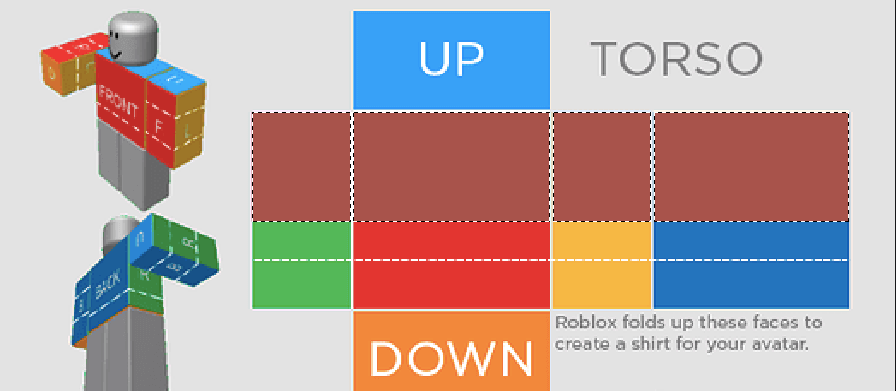
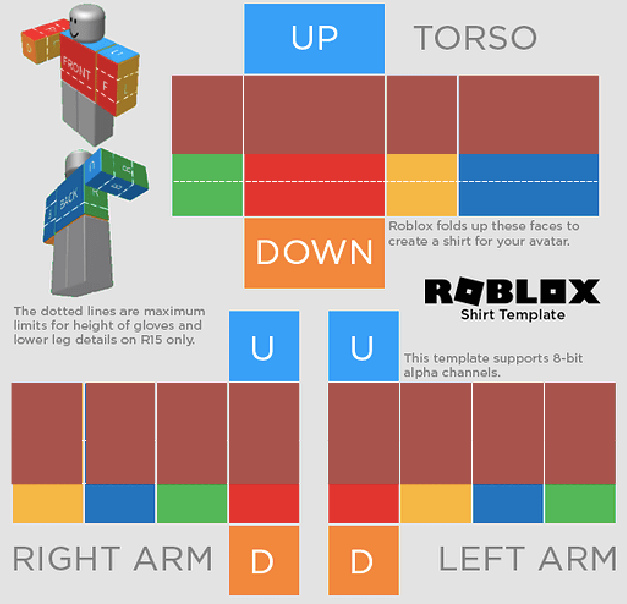
To make your designing process easier, you must first download the correct Roblox template. Be careful to not switch the two templates as they can look similar at a glance (left for pants, right for shirts). If you are wondering where to get these, not to worry! Pixlr has gone ahead and prepared things for you in advance; simply click here to download them.
Step #2: Open the template on Pixlr E
-
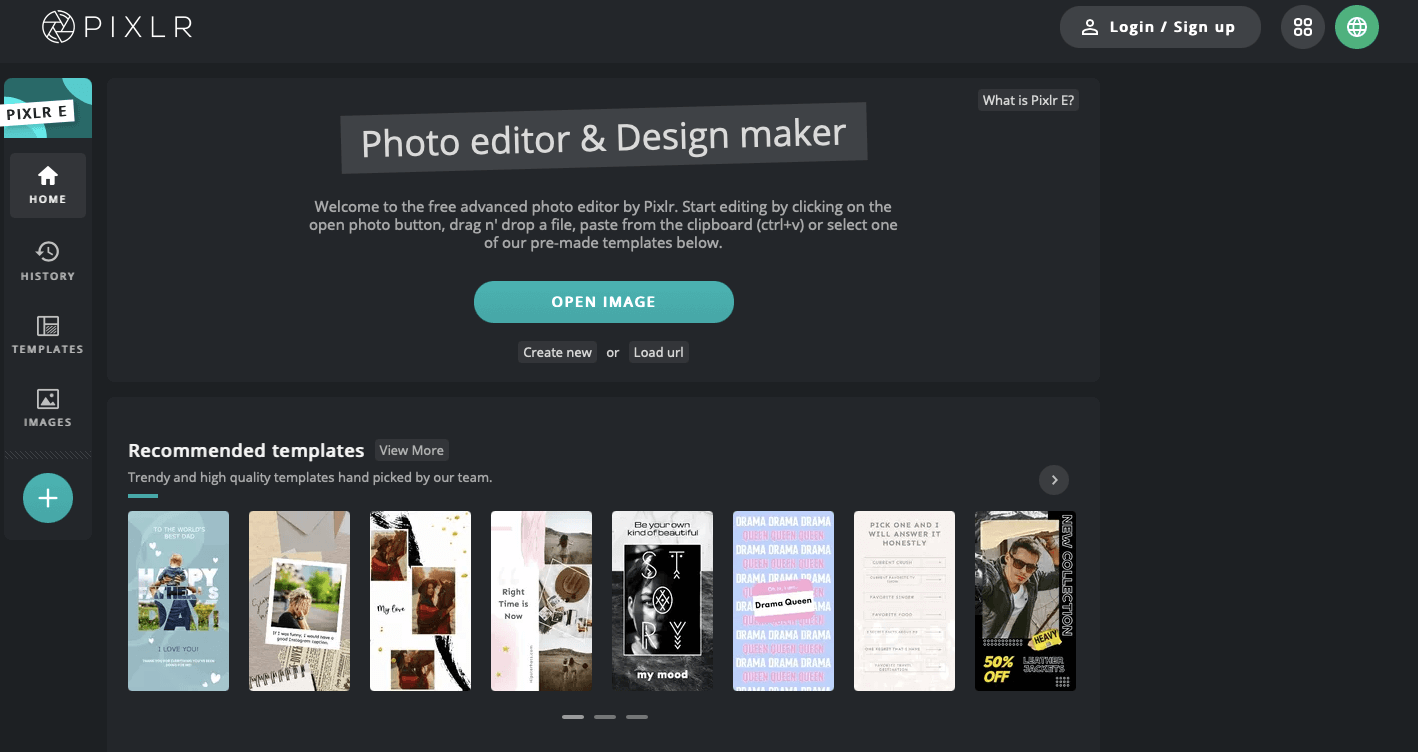
- Pixlr E homepage.
Now, you are ready to begin your design. All you need to do is open up Pixlr E, an advanced mode for Pixlr users. To ease your editing journey, feel free to create an account with your email or log in with your existing one if you have already signed up.
Click on the “Open Image” button and upload the template you just downloaded. Let’s say you are in the mood of designing a Roblox shirt, select the file from your computer and you would be directed to the editing site (see below).
-
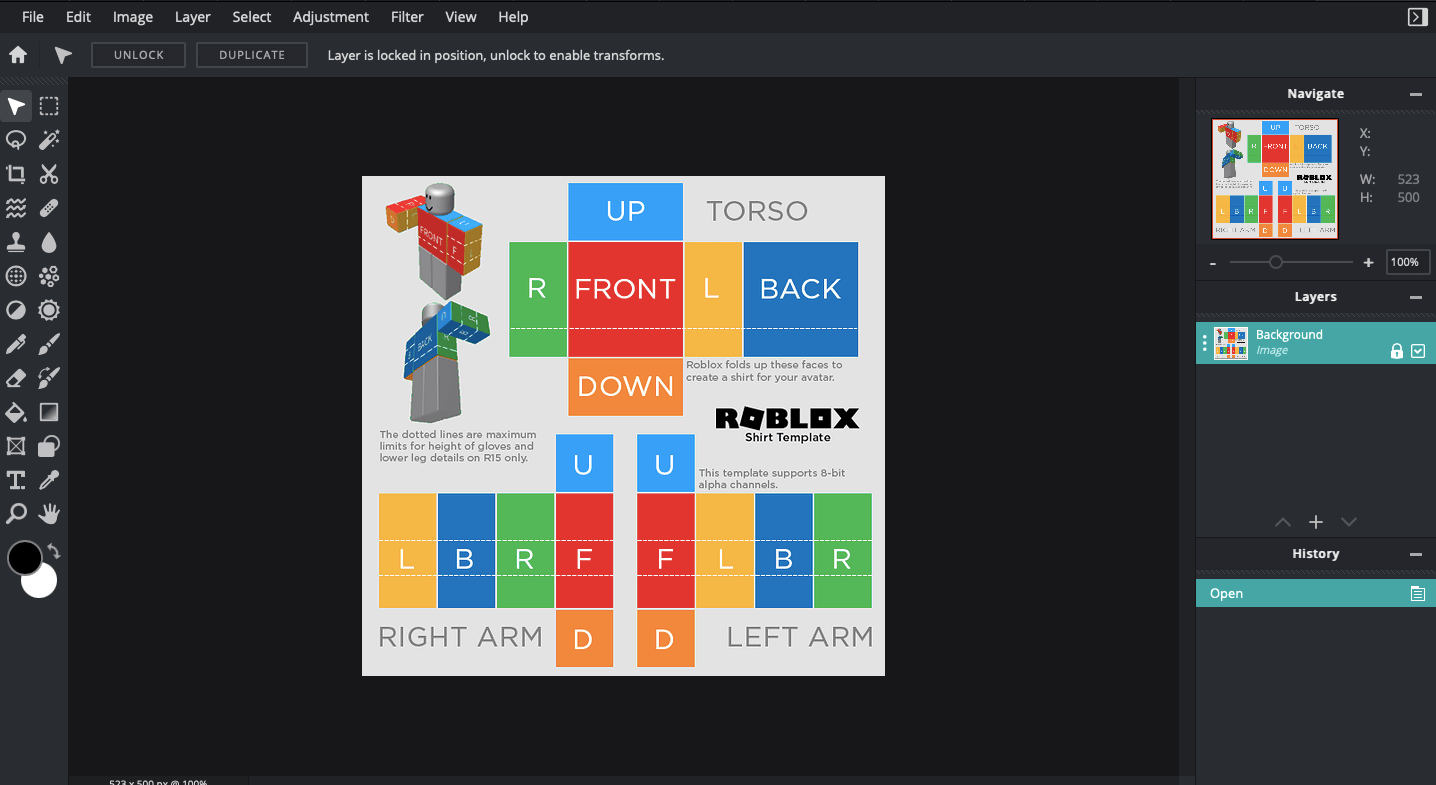
- Uploading the Roblox template.
Step #3: Creating the base
Adding a new layer
The particular step works the same for both Roblox shirts and pants. In adding a new layer for your base, the original template would not be affected with your editing.
You add a new layer in only few steps;
1. Head over to the ‘Layers’ section on your right side. Click the ‘+’ button on the bottom.
-
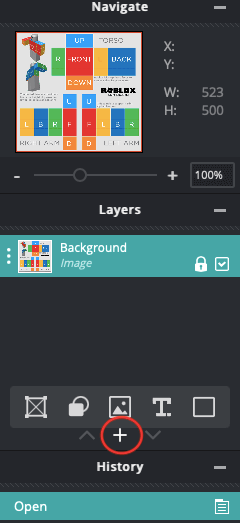
- Adding a layer.
2. Select the ‘Empty’ option.
-
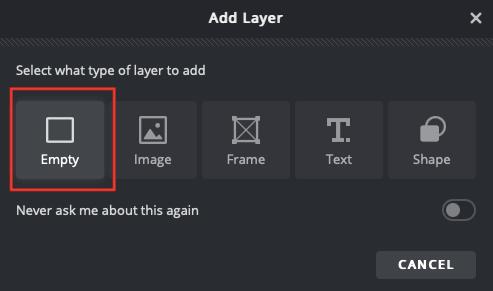
- Selecting the type of new layer.
3. The new layer is then created on top of the template.
-
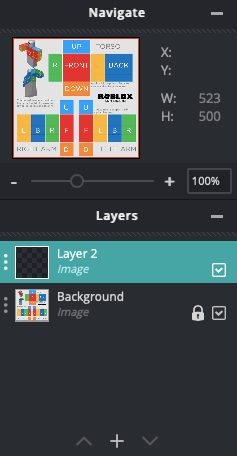
- Visual of the new layer.
Trace the pattern
Now, you can use the Marquee Select tool to trace the pattern of the shirts or pants. Simply click on this dotted rectangle icon on the top right.
-
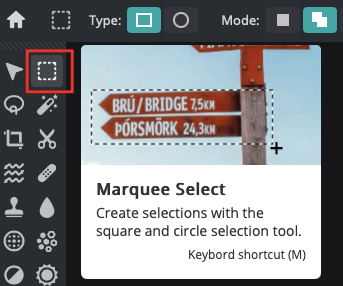
- Marquee tool.
Don’t forget to have your end design in mind and incorporate it when tracing. Would the shirt be long-sleeved or short sleeved? Would it be crop-topped? For more inspiration, you can browse here.
This example below is if you are aiming for a long-sleeved crop top.
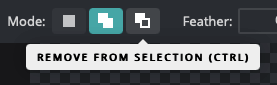
Drag your cursor and follow along the dotted lines for the torso. It would then look something like this. Notice how the boxes are not traced all the way to the bottom.
-
- Tracing the shirt pattern.
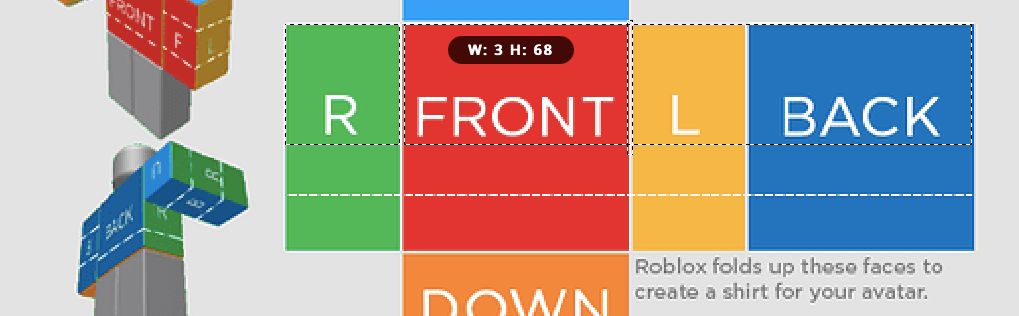
To deselect the spaces in between the faces (R, Front, L and Back), change the mode of the Marquee tool to the third one titled ‘Remove from selection’. The areas that you select would then be removed and there would be gaps in between the segments (see below).
-
- Removing the unwanted areas.
-
- Gaps in between the rectangles have appeared.
Then, choose a color you want your shirt in. You can do so by clicking on the Color Picker tool on the very bottom of the toolbar.
-

- Color Picker tool.
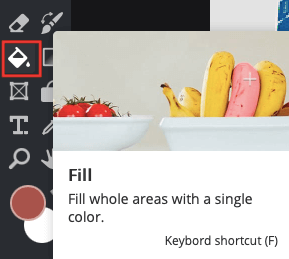
Select the ‘Fill’ tool and proceed to click the area you have selected. It would then be automatically filled with the shade you have chosen.
-
- Fill tool.
-
- Filling in the shirt’s patterns.

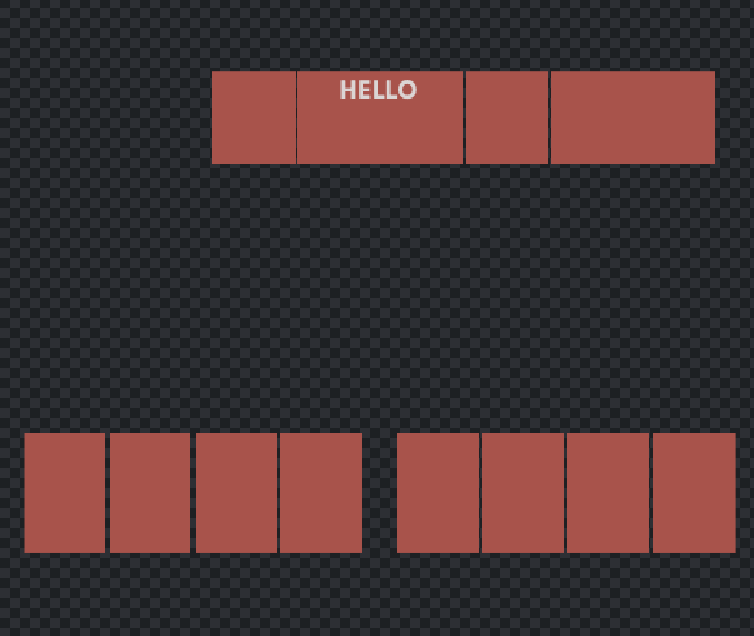
Repeat the same tracing process for the sleeves (this is also applicable for pants design too). The end result for the shirt’s base should look similar to this;
-
- Finalized shirt base.
Remove the original template
For the design to work on Roblox, it is advisable to remove the original template (ie. the background layer). To do so, you can head over to the Layers section again and uncheck the box right next to the layer named ‘Background;.
-
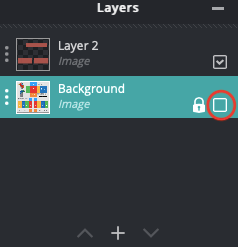
- Turning the background layer invisible.
Doing so would turn your background transparent such as this;
-
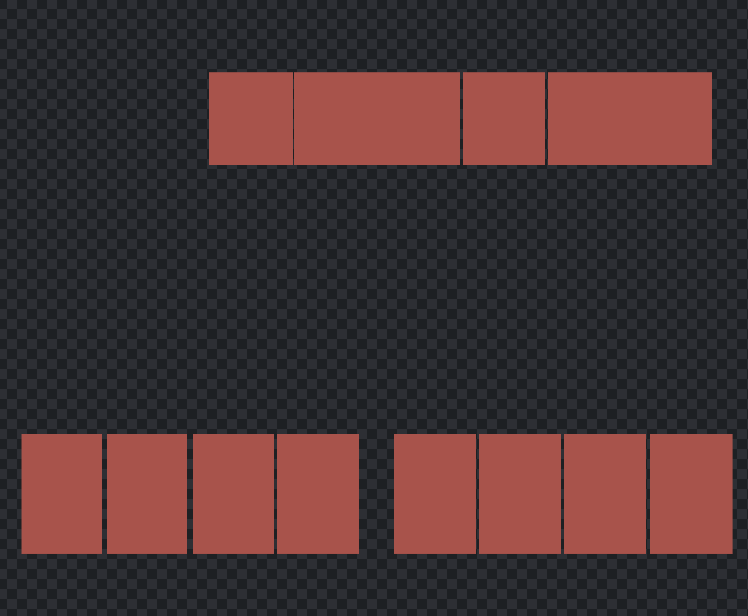
- The basic pattern without the background layer visible.
Step #4: Customize your shirt
Now that the base is done, you are free to personalize the shirt however you want. For starters, you can insert text by clicking on the ‘T’ icon.
-
- Selecting the text tool.
Then, fill in the words you want to insert on your shirt. You can also adjust the settings of the font on the top of your page. Be sure not to make the text too large as it may look unusual on your avatar later on.
-

- Text adjustment.
-
- The shirt with added text.
Additionally, you may want to add a logo or an image on top of your shirt. All you need to do is find the image you prefer and download it onto your device. Be sure to choose the image file in PNG, hence it would have a transparent background.
Then, go over to the layers again and click on the ‘+’ button, this time select the ‘Image’ option. Select the image from your computer and resize it. It should then look something like this;
-
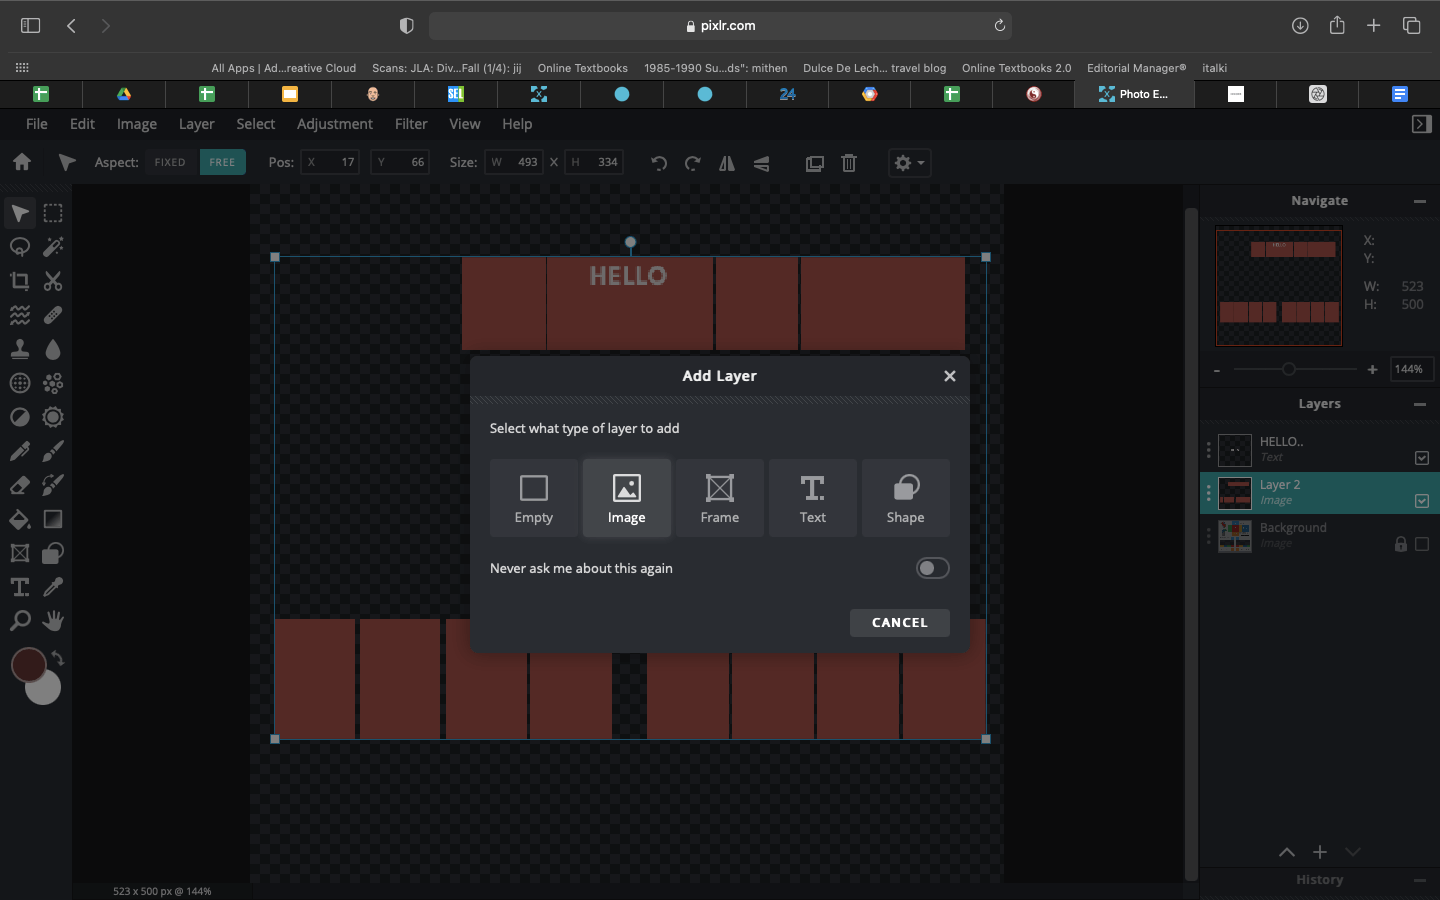
- Adding a layer.
-
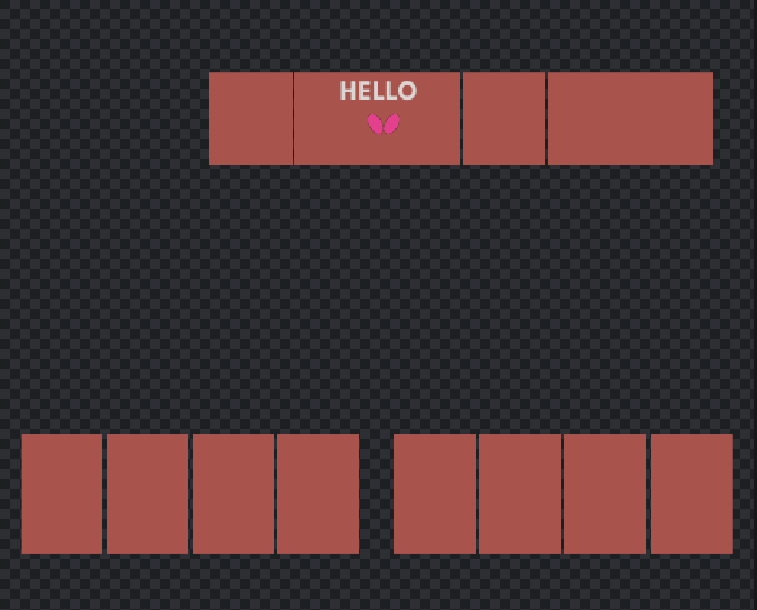
- The shirt design with added logo.
Step #5: Save your design
-
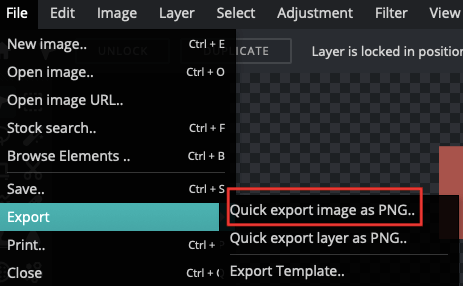
- Saving the finalized design.
Once you are satisfied with your design, you can click on ‘File’ on the top right corner and proceed to export it as a PNG. Your shirt template is now ready to use! Upload it onto Roblox and give it a try on your avatar.
Ready to design your first ever shirt with Pixlr?
With only 5 steps, you can utilize Pixlr E’s AI.I-powered tools in creating the most impressive Roblox clothing yet. Curious to explore more features? Head over to the site and try it for free now.
Follow our video tutorial on how to create a Roblox T-Shirt with an 80’s Sunset Effect HERE.
Article written by Annisa Sharfina Akhmad