What is a bokeh?
Bokeh, otherwise known as ‘boke’ is the quality of the out-of-focus or ‘blurry’ picture pieces that a camera lens makes — it is not the blur itself or the amount of blur in the front or background of a subject. The blur that you see in photography which distinguishes a subject from the background is the product of a shallow “depth of field” and is commonly called “background blur.” What photographers call bokeh is the quality and feel of the background flushing and reflecting points of light.
Can you still create a bokeh without the equipment?
The answer is… YES, YOU CAN!
Bokeh is usually achieved by using lenses with longer focal lengths and wider apertures. Many photographers invest in prime lenses to achieve visible bokeh in their photos, whereas some prefer shooting with telephoto lenses to create hazy backdrops.
But how many of us can actually afford a good lens, let alone a professional camera?
If you can’t take it, fake it!
That’s right! If you don’t have the right camera or lens to capture bokeh, you can always add the effect to your images during the editing process. And no, you don’t need Photoshop for this.
Introducing Pixlr’s Focus Studio
Earlier this week, Pixlr rolled out a brand new feature – Focus Studio. It’s a game changer for many creatives as it allows users to easily create realistic depth of field and add various bokeh effects to images. It’s the perfect tool to elevate any portrait!
So, without further ado, let’s dive right into Focus Studio!
Step #1: Select your mode
Open your image in Pixlr X and click on Focus Studio, the last icon in the toolbar on the left.
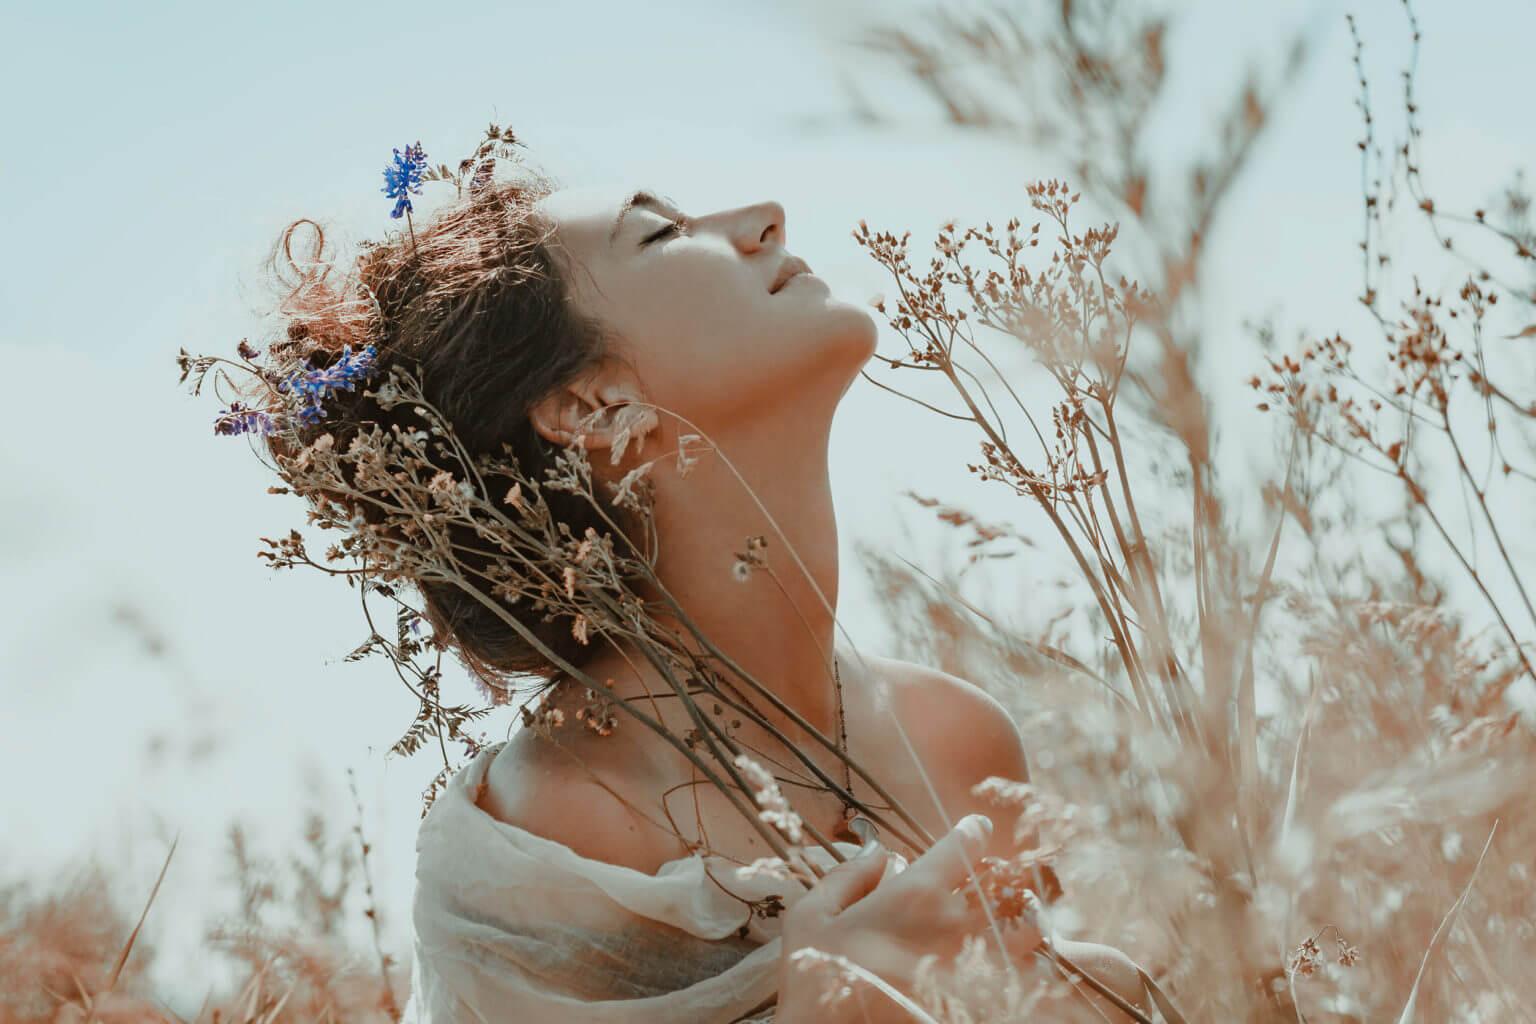
Photo by Elina Zolotareva, 123RF.
Now, you may select your Mode. There are 4 Mode options – Symmetric/Tilt, Radial, Linear and None (Random).
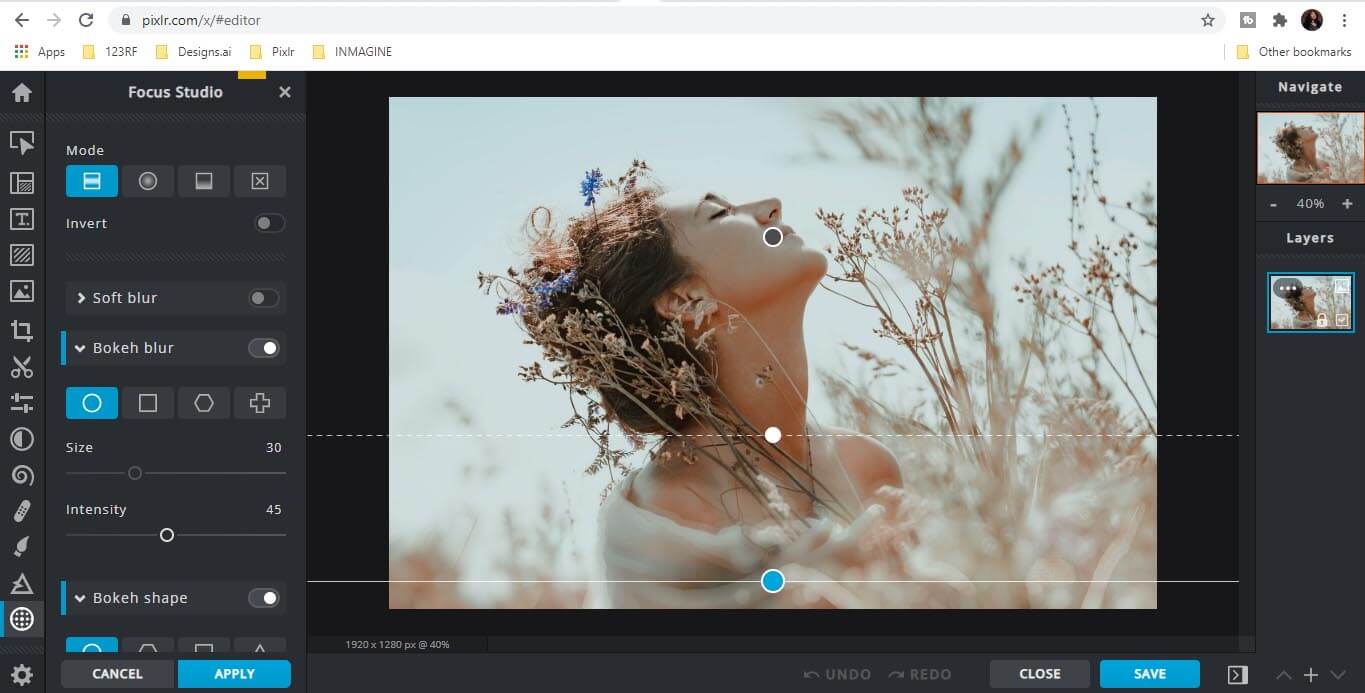
The Mode displayed in the screenshot below is Symmetric/Tilt. The dots are anchor points which you can drag upward or downward to adjust the placement of the Bokeh Blur.
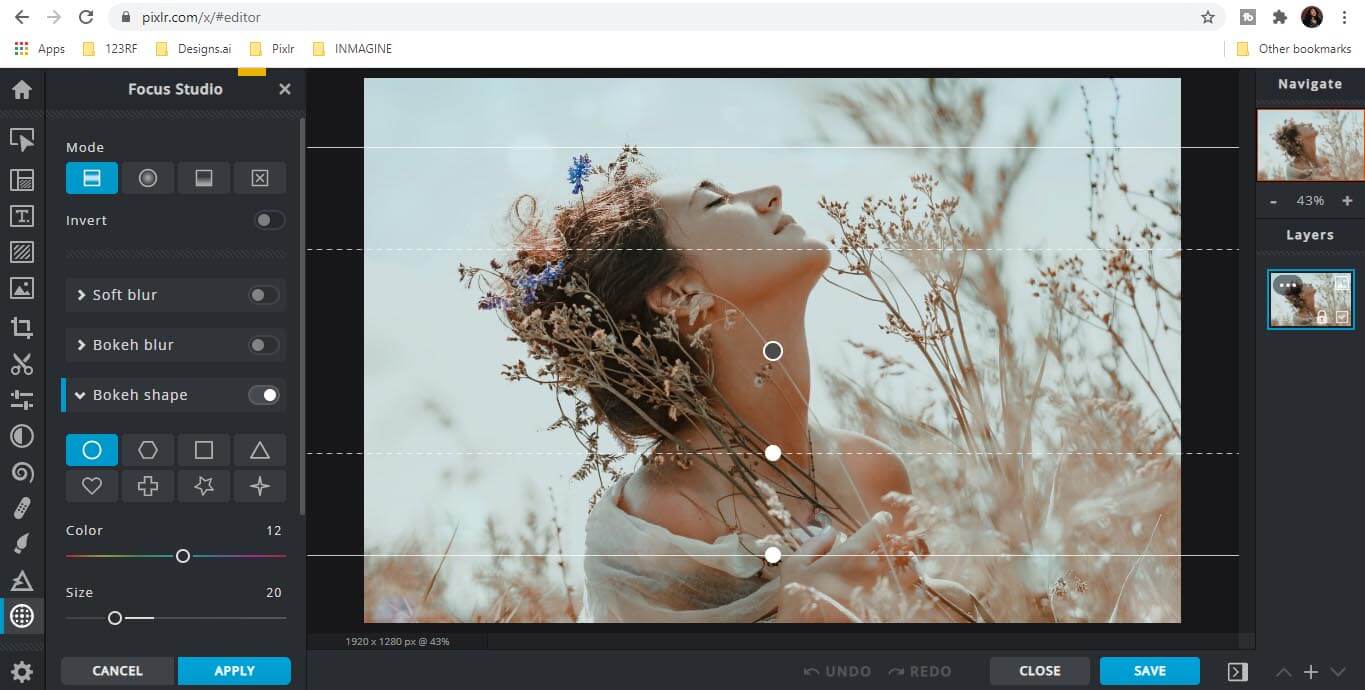

Step #2: To blur or not to blur
This part is entirely up to you – whether you want to apply a Soft Blur or Bokeh Blur. You can also change the size and customize the intensity of the Blur.
As shown in the screenshot below, we’ve decided to go with a mild Bokeh Blur and moved it to the bottom of the photo to avoiding blurring our model’s face.
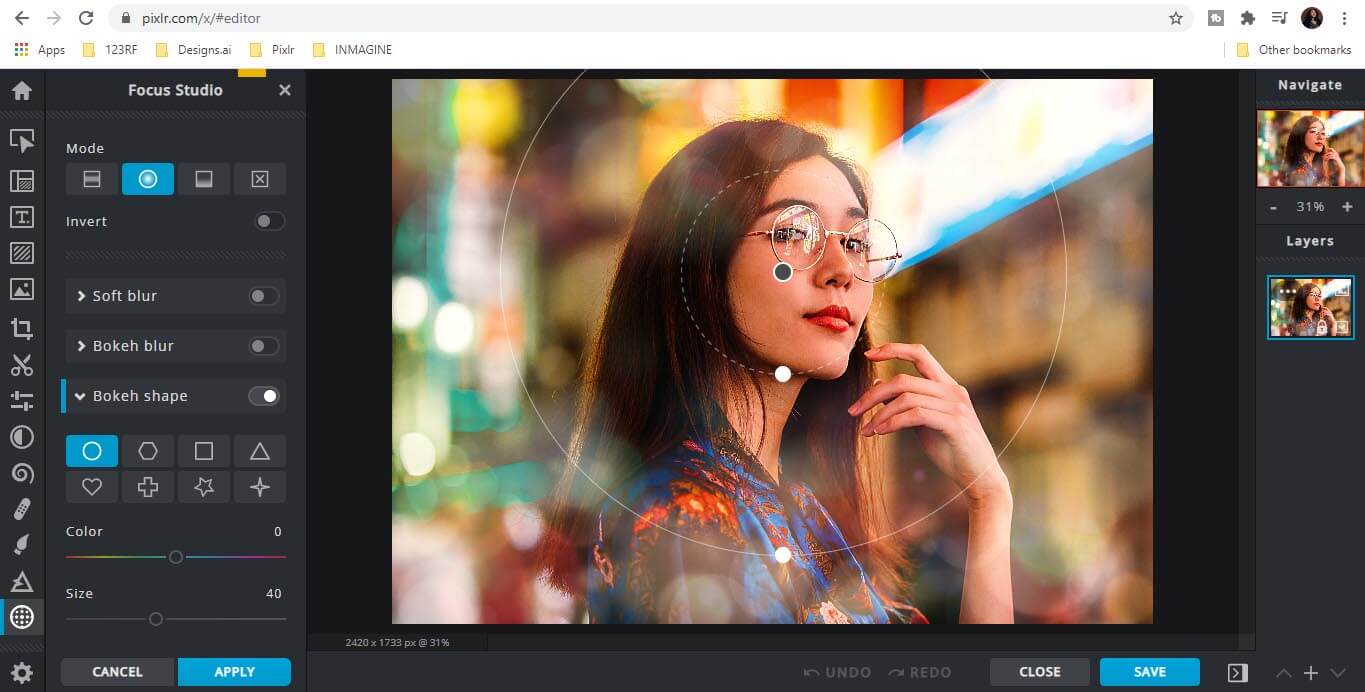
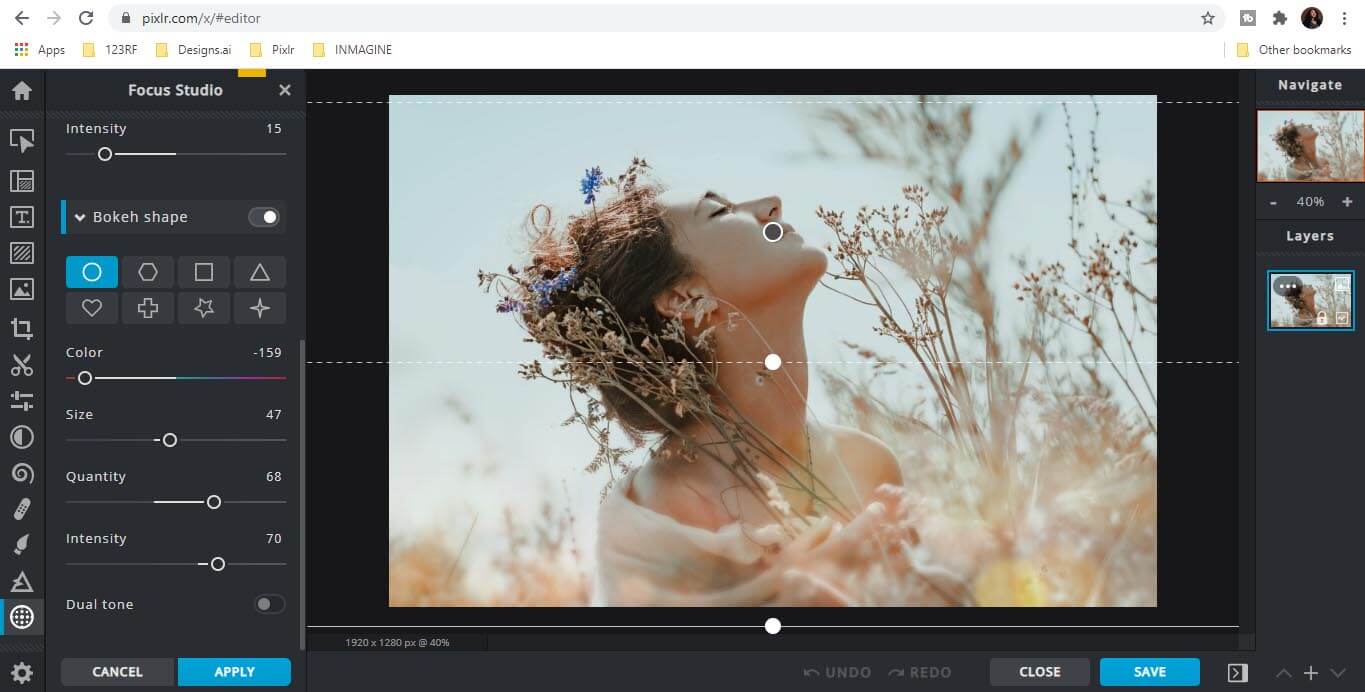
Step #3: Customize your bokeh shape
This is where the fun really begins. You get to pick the shape and color of your bokeh. You can also adjust its size, quantity and intensity based on your preferences.
For our image, we’ve decided to go with the classic circular bokeh with an orange tint to emulate lens flares.
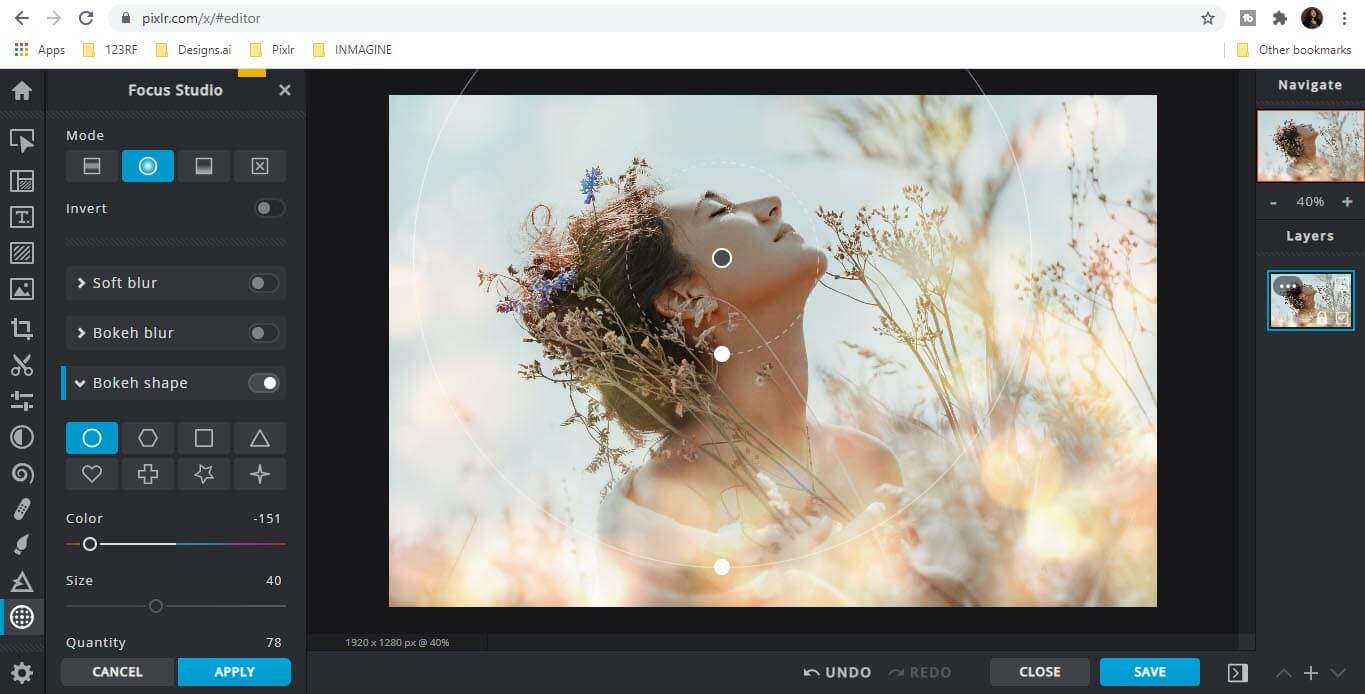
Step #4: Add another bokeh mode
This step is optional but recommended.
As you can see, we’ve added a Radial Mode and created a “ring” of light to accentuate the model’s face.
Step #5: Add the finishing touches
Finally, click on Adjust & Filter and do some final touch-ups e.g. increase vibrance/saturation and adjust temperature/tint/hue.
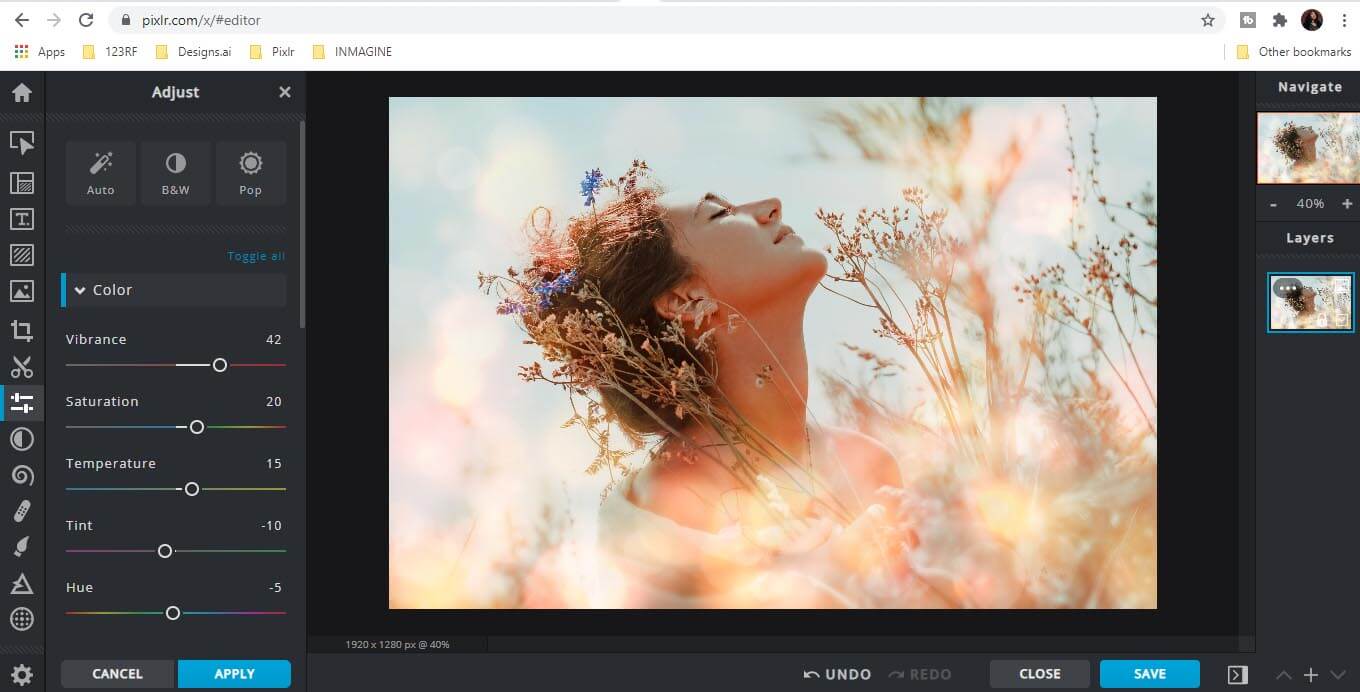
And just like that, you’re done!
Article written by Jingxi L.