
Since Pixlr Express added the History Brush to mobile apps, I’ve been experimenting with it in different ways. Pixlr Express for the web has had this capability for a long time, but having it added to the phone versions encouraged me to pick it up again on the web version and try some new things.
What I can’t stop making with the History Brush, and which you might enjoy trying out, are what I’m calling “illustrated” portraits. You start with a well-composed photograph of a friend or loved one and, by using various overlays in combination with the history brush, you end up with a portrait that places your subject in the foreground with an illustrative background — almost like a comic book in some ways. You’re basically creating a very rich, textured background while leaving your subject in real-world focus.
Give this a shot. You might find that what you end up creating is artwork worthy of being printed on canvas and hung on the wall. Come to think of it, it’s probably one of the best gifts you could give someone: an artistic portrait that’s handmade and extremely creative.
Step 1: Start with a great photo
You’ll want a photo that is well-composed, that really features your subject, preferably one that shows most of their body. A picture of four family members standing in front of the Eiffel Tower simply won’t do. This technique works best with solo subjects, but you can find creative ways to include more than one person or even make a portrait of an object.
Step 2: Pick your overlays and effects
Open your image in Pixlr Express and do any normal photo editing you would do like auto-adjust or color correction. Then, think about the overlays you want to use. You may want to try a bunch out (use that undo button!) until you find the two or three that really work with the photo you’re using. The point here: You’re going to work in a step-by-step fashion, so it’s probably best to know which filters you want to use ahead of time and then work in a very deliberate way.
Step 3: Add an effect and brush out your subject
Start by laying down an effect and then use the history brush to brush the effect out of the area of your subject. If you plan on printing this later in a large format or even printing it on canvas (which is my plan), you may want to be more meticulous with the brush. Then again, a little sloppiness with the history brush will increase the “comic book” illustrative look, so be sloppy if that is the effect you want to achieve.
Step 4: Repeat step 3 until you’re satisfied
Each time you add an effect, you’ll want to use the history brush to restore your subject itself to their real-life look. As you add more texture or color or overlays or whatever you’ll start to see that your subject really does start to stand out in a dramatic way the more effects you add. But you can definitely go overboard with this technique. If you want your subject to look like they are a real-life person walking through a Van Gogh painting, you can probably achieve that, but I’ve found that subtle effects are often better. Try choosing effects that complement the personality of the person you’re spotlighting.
Example: Crafty spots
Here’s an example of one I created for an Instructables community member who makes very pretty, very crafty things. I made everything in the background look like it’s covered in dots:
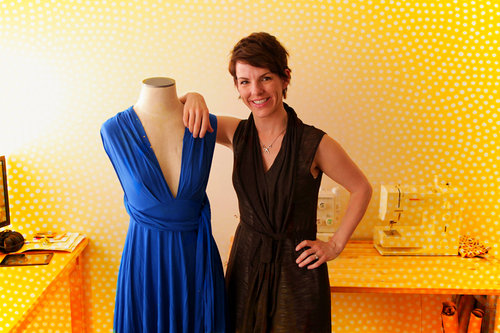
Some effects used: The “Sunflower” overlay located in the Paper set + plenty of saturation, vibrance, and color tweaks.
Example: Cyborg warrior
You can use the history brush with all kinds of adjustments — not just overlays. For example, you can oversaturate your photo dramatically and then paint your subject back without the saturated color.
Here is one that I made for an Instructables superstar who builds dramatic science-fiction worthy things out of discarded materials like working robot arms. He deserves a lot of effects:
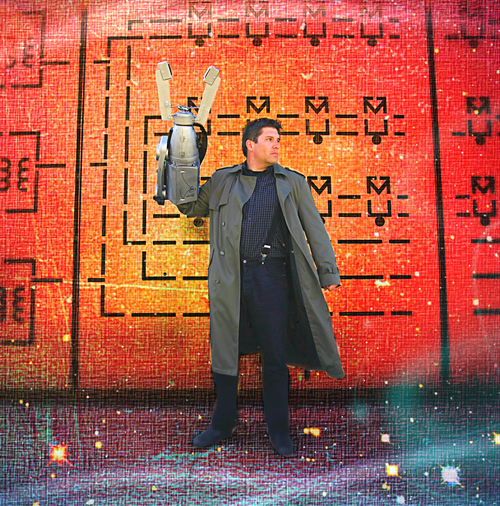
Some effects used: The “Weave” overlay from the Canvas set + focal blur + various light leaks and chemical burns + a space overlay + tons of color saturation.
Example: Poster child
If your subject has other items they are interacting with that you can brush out, well that’s even better. See below how I have brushed out the Quickrete and other tools being used by this Instructables artist in residence. This is a great way to put an emphasis on someone doing something they love or interacting with items they love.
When you’re nearing completion, you might want to let one effect work through your subject and not brush it out with the history brush — like the “Beam” Retro Poster effect I added here. It can add another layer of interestingness to your portrait.
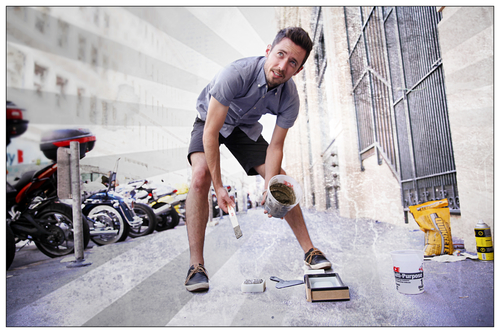
Some effects used: The “Stoned” overlay in the Grunge set + focal blur + a retro poster overlay that I didn’t brush out with the history brush.
Up for the challenge?
If you try out this technique, please let us know how it went! Share your image to our Flickr group or shout to us at @pixlr on Twitter. We’d love to see what kind of artwork you can make using the history brush.