Who hasn’t heard of kaleidoscopes?
If anything, these intriguing little tubes are one of the most common things that we all share when reminiscing about our childhoods. The geometric patterns and colors that kaleidoscopes produce are endless and dazzling all the same. So why not recreate this look using Pixlr E?
Let us guide you with quick and easy steps on how you can apply our latest creative filter, Kaleidoscope, to transform your images.
Why use the kaleidoscope filter?
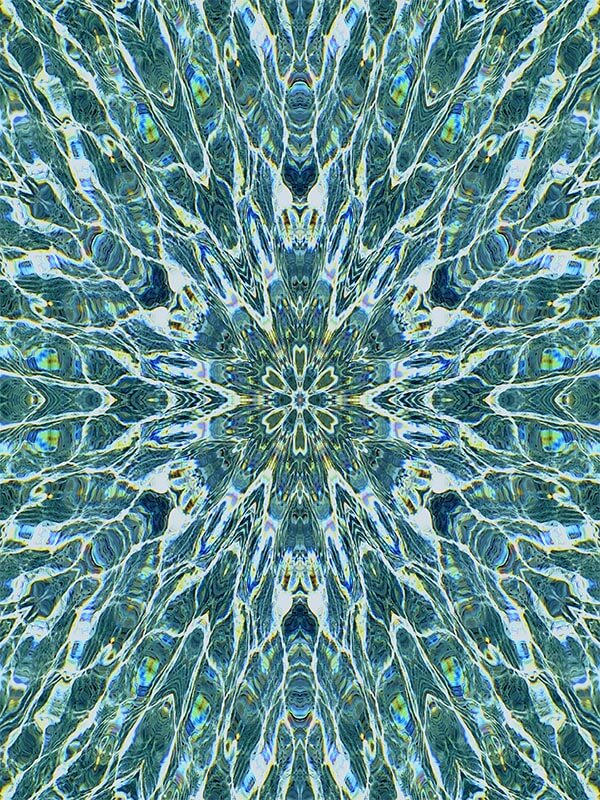
One thing for sure, this particular filter would ensure your image would turn out looking extraordinarily eye-catching. Not only would it evoke nostalgia among your target audience, the kaleidoscope filter also guarantees a trippy edit that can change how one may perceive the subject of your photograph.
All in one, trying on this filter on your image would not leave you disappointed. This hypnotizing look would not leave your viewers’ mind any time soon, while it also makes a great desktop or mobile wallpaper. All you need to do is follow the easy steps below;
Step #1: Pick a suitable image
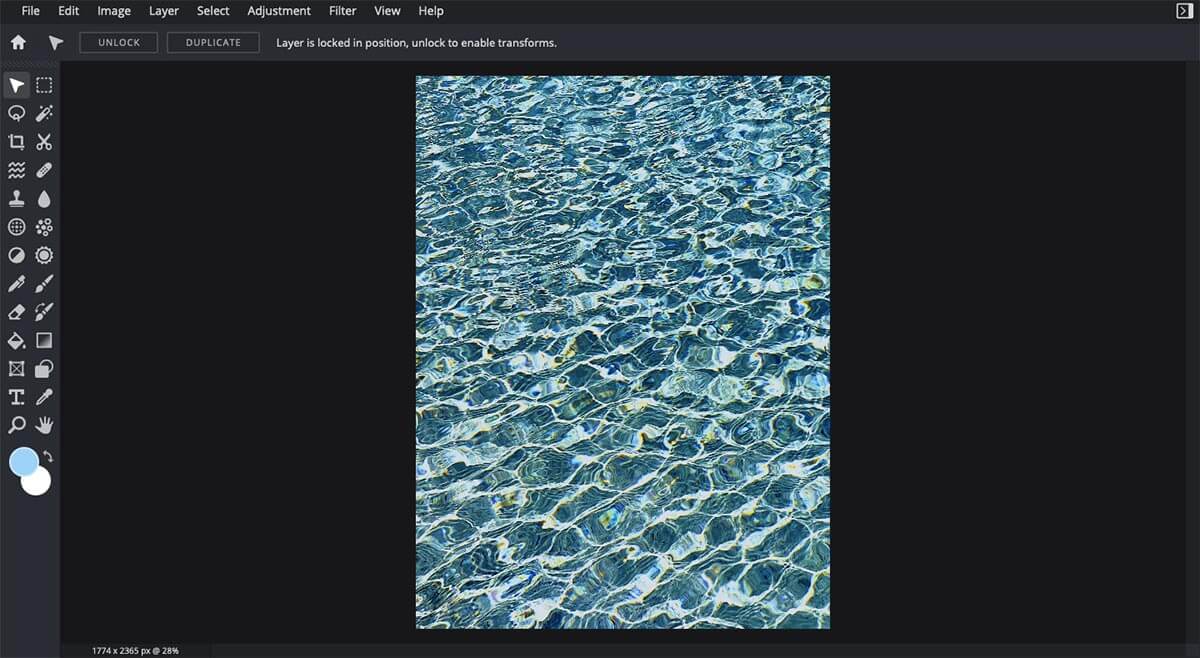
First things first, you need to select the right image. Pictures that are filled with bold, contrasting colors tend to work better with this filter as they can generate a more satisfying result. You can upload your own image onto Pixlr E, or choose from our vast collection of premium stock photos.
Step #2: Find the Kaleidoscope filter
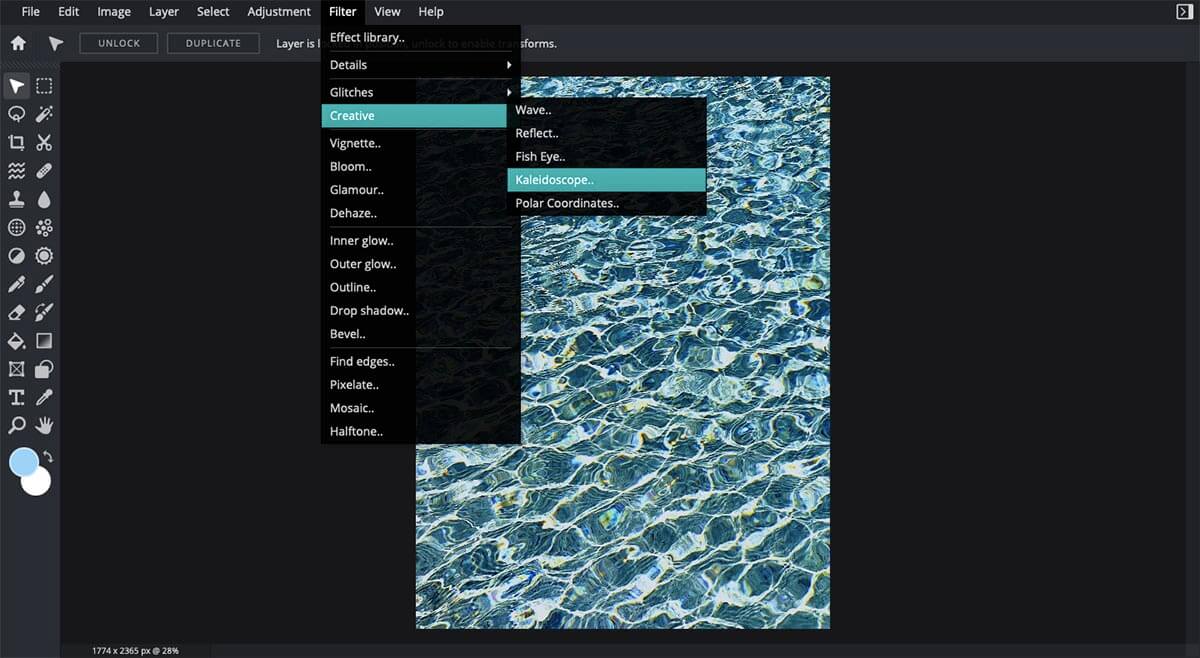
Next, you would need to find our new series of creative filters. Simply find the tab ‘Filter’ on the topbar and scroll down to ‘Creative’. Once you place your mouse on this, you would see the five latest addition of filters listed on the right. Click on ‘Kaleidoscope’.
Step #3: Customize the effect
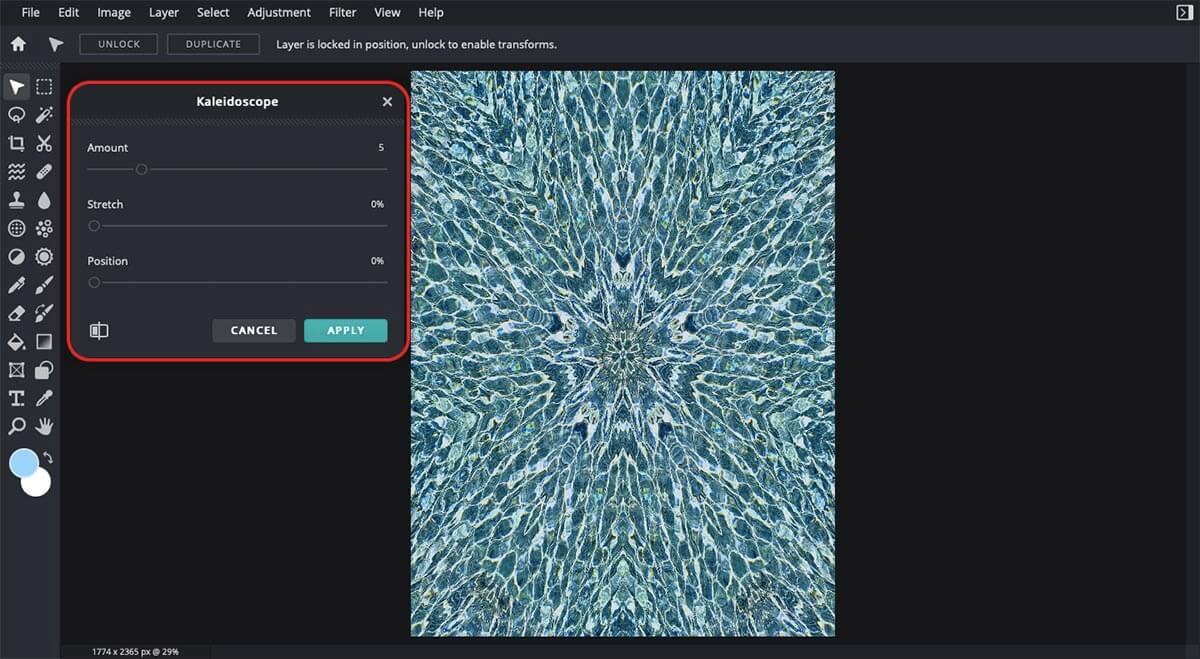
This small box (highlighted in red above) consisting of tools you can use to tweak this filter would then appear. As you can see, the kaleidoscope effect is instantaneously applied onto your image here.
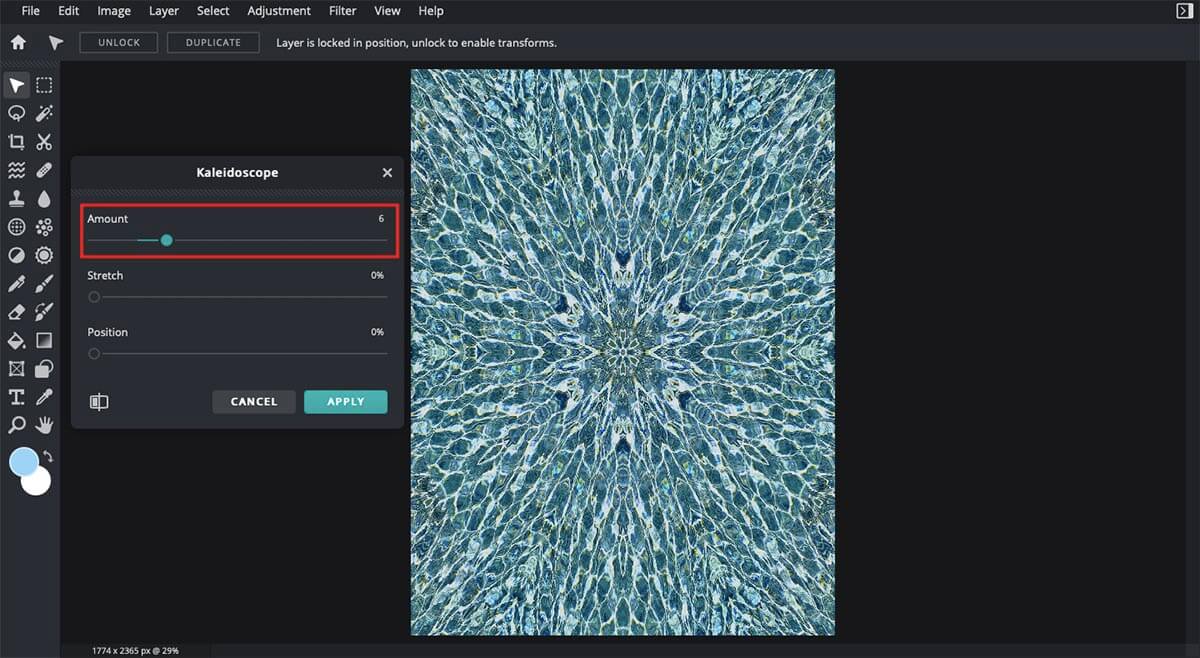
Now, feel free to explore the three tools listed under this creative filter. The first one, titled ‘Amount’, controls just how many divisions of geometric patterns you can make. Simply drag your cursor back and forth along the scale to adjust it as you please.
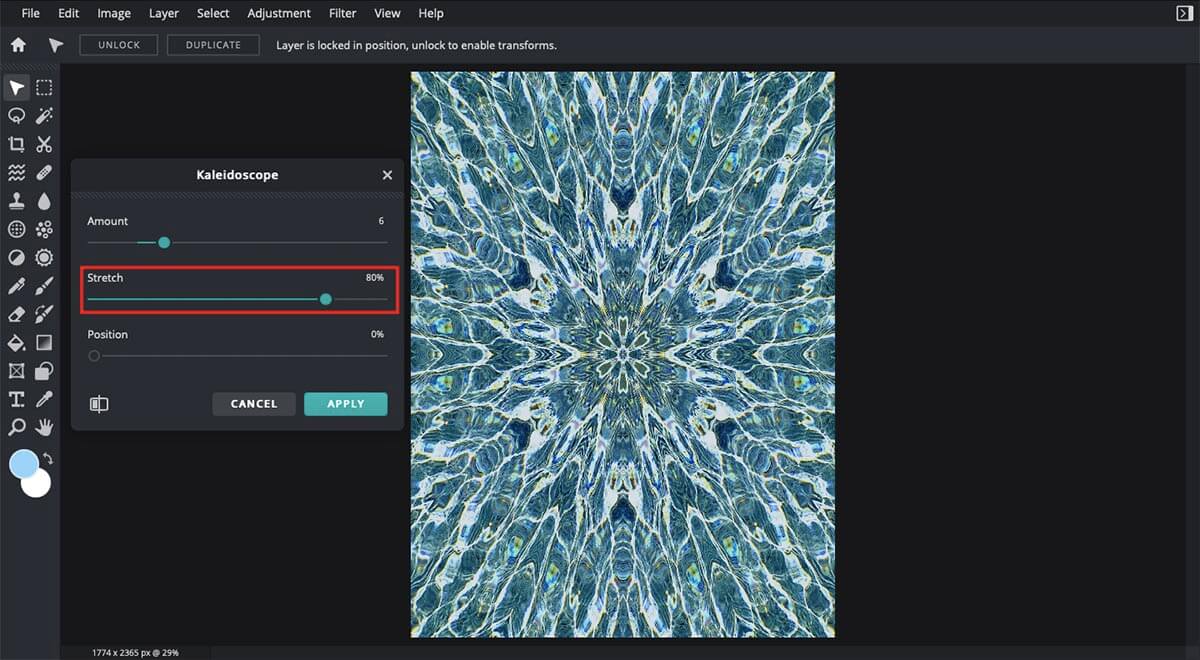
The second adjustment you can make would be by ‘stretching’ your image. Using the ‘Stretch’ tool, you can simply choose how zoomed in your edit would be. If you would like it to focus on the pattern in the center, simply drag your cursor to the right side of the scale to zoom in and achieve your desired framing.

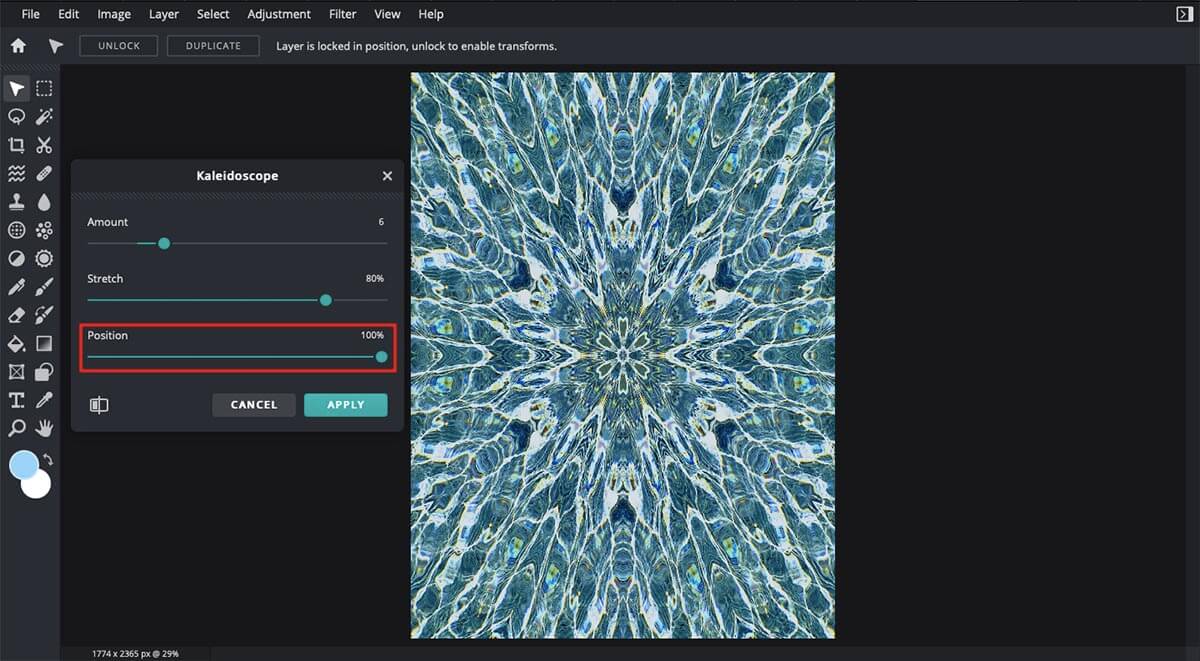
True to its name, this last feature called ‘Position’ lets you create endless combinations of geometric patterns. You can embrace the inner maximalism in you as this editing tool allows you to generate the boldest, most striking visuals yet.
Step #4: Final touch-ups
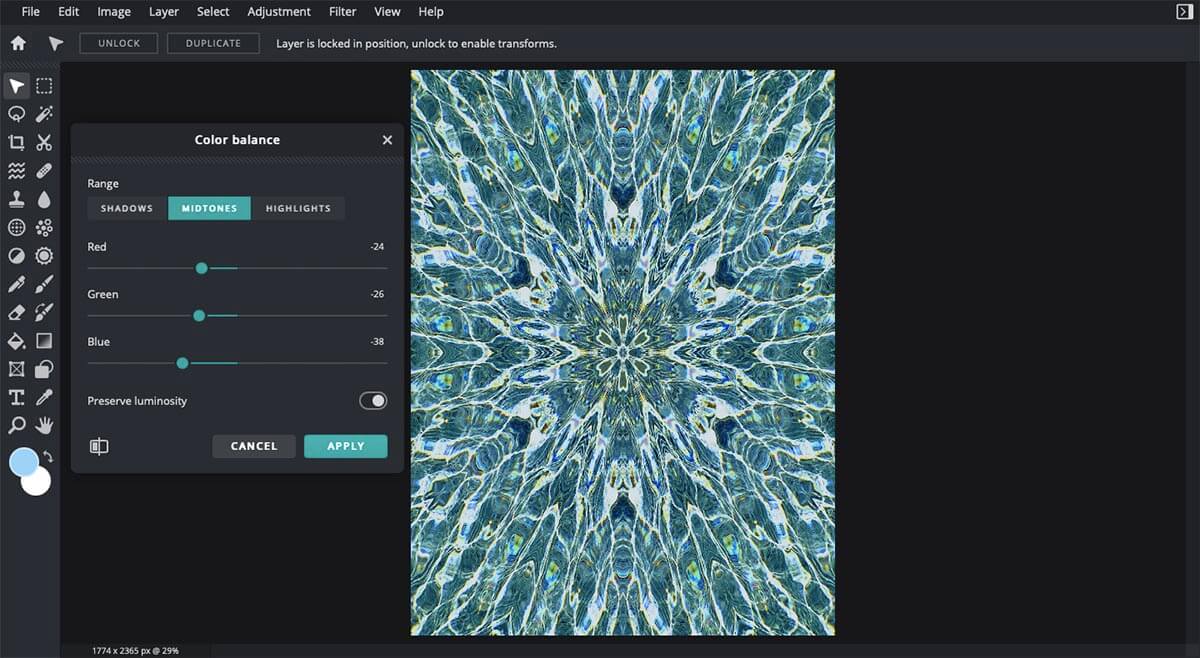
Basically, you are now done achieving this dreamy yet chaotic kaleidoscopic look for your image. However, if you would like to adjust and edit the image more, you are welcome to do so! What we’d recommend is usually to start by the colors.
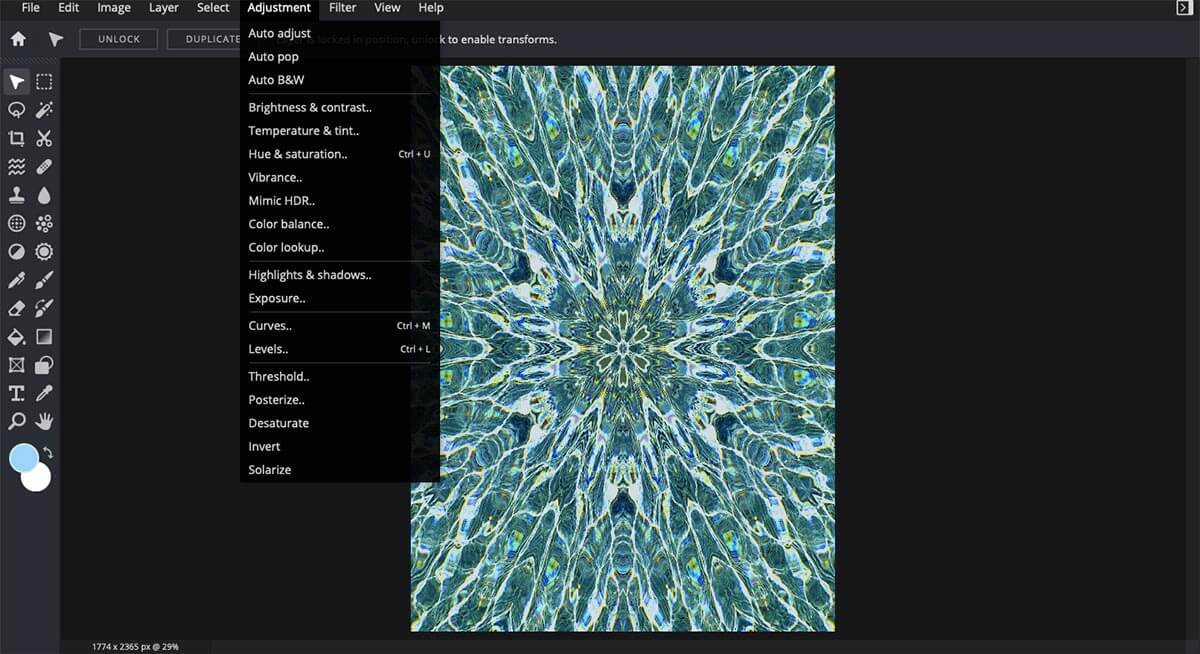
Simply click ‘Adjustment’ on the top-bar and choose ‘Color balance’ (as pictured above). Of course, you can also experiment with other editing tools such as Auto adjust, Brightness & contrast, and many more.
Step #5: Save your edit!
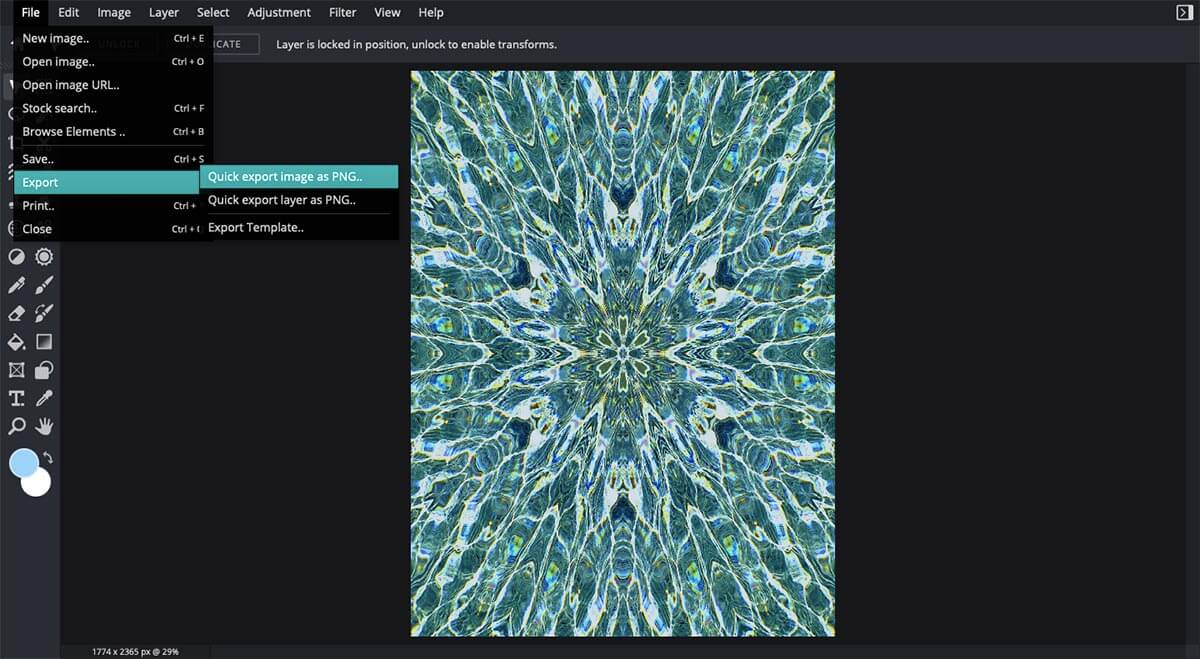
Once you are happy with your kaleidoscopic masterpiece, time to hit the download button! To do this, you can click ‘File’ on the top left corner of your screen, scroll down to ‘Export’ and click the option named ‘Quick export image as PNG’. The final edit is now saved onto your device!
Explore the latest additions to our filter collection
It goes without saying that the Kaleidoscope filter is not the only new effect that you can experiment with under the Creative filter series. If you would like to read another simple and quick how-to tutorial on how to utilize the other filters, we got you covered.
Let your imagination soar and realise it with the help of our intuitive, AI-powered editing tools now!
Article written by Annisa Sharfina Akhmad