We’re all here for visual content. In the age of social media and consuming content night and day, being out of the ordinary can go a long way. These wave-like effects are definitely something that catches our attention online. It’s a great way to switch things up, keep your viewers engaged and also… impress with your photo editing skills!
So, how can you get started? Pixlr E just launched our new collection of Creative filters. We’ve named it none other than the Wave filter. You might think that the Wave filter can only create edits such as the photo above. That’s where you’ll be floored! We’ll show you exactly how versatile this filter can be.
Not only will you be editing photos like a pro, but it’ll also take up a fraction of the time compared to Photoshop! (The time saved and ease of editing with Pixlr E is a huuuge factor, if we may say so ourselves).
As a guide, we’ve decided to use a simple photo of clouds and the sky. Our mission is to turn it into something unique, trippy and add movement to it.
Check our quick guide below:
Step #1: Select Your Filter
After you’ve uploaded your image on Pixlr E. Click on Filter, the seventh icon found on the top bar. Next, screen through the options, then hover your cursor over Creative.
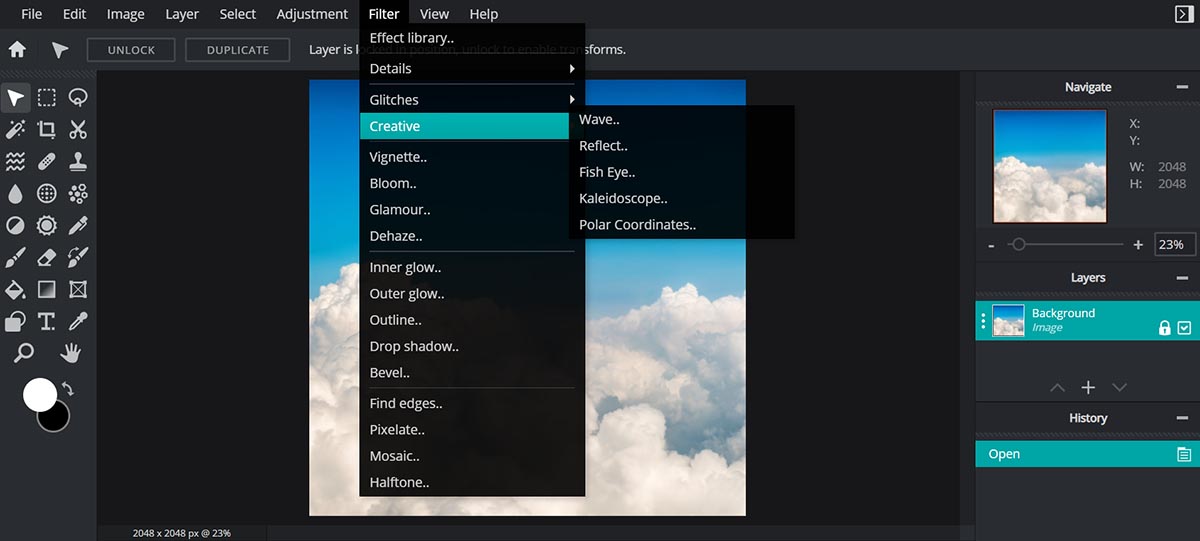
Now, you may select the effect you want. For this tutorial, click on the Wave filter.
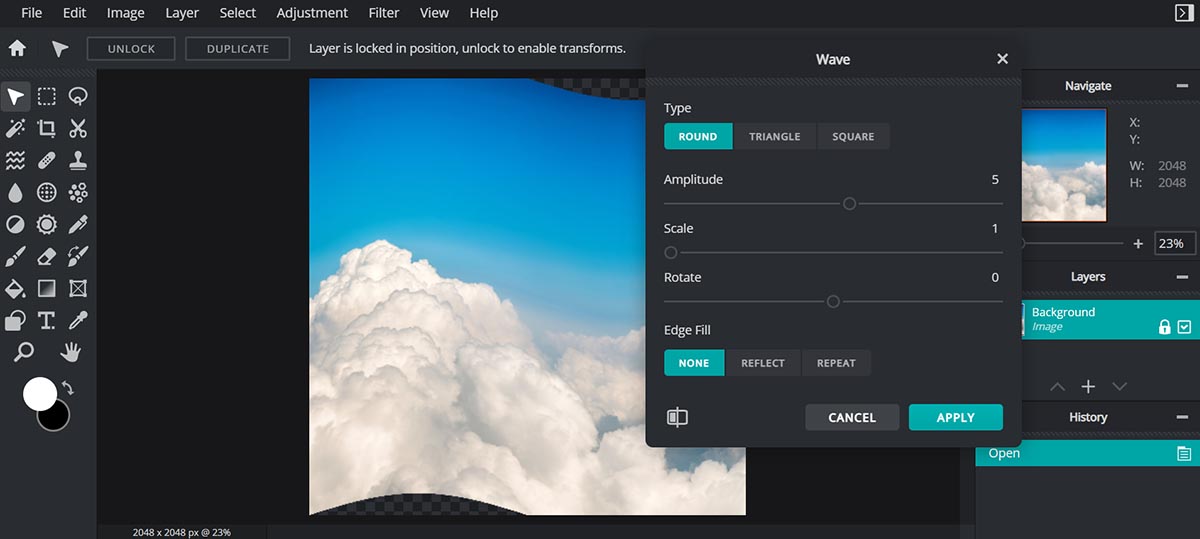
Step #2: Choose Your Style
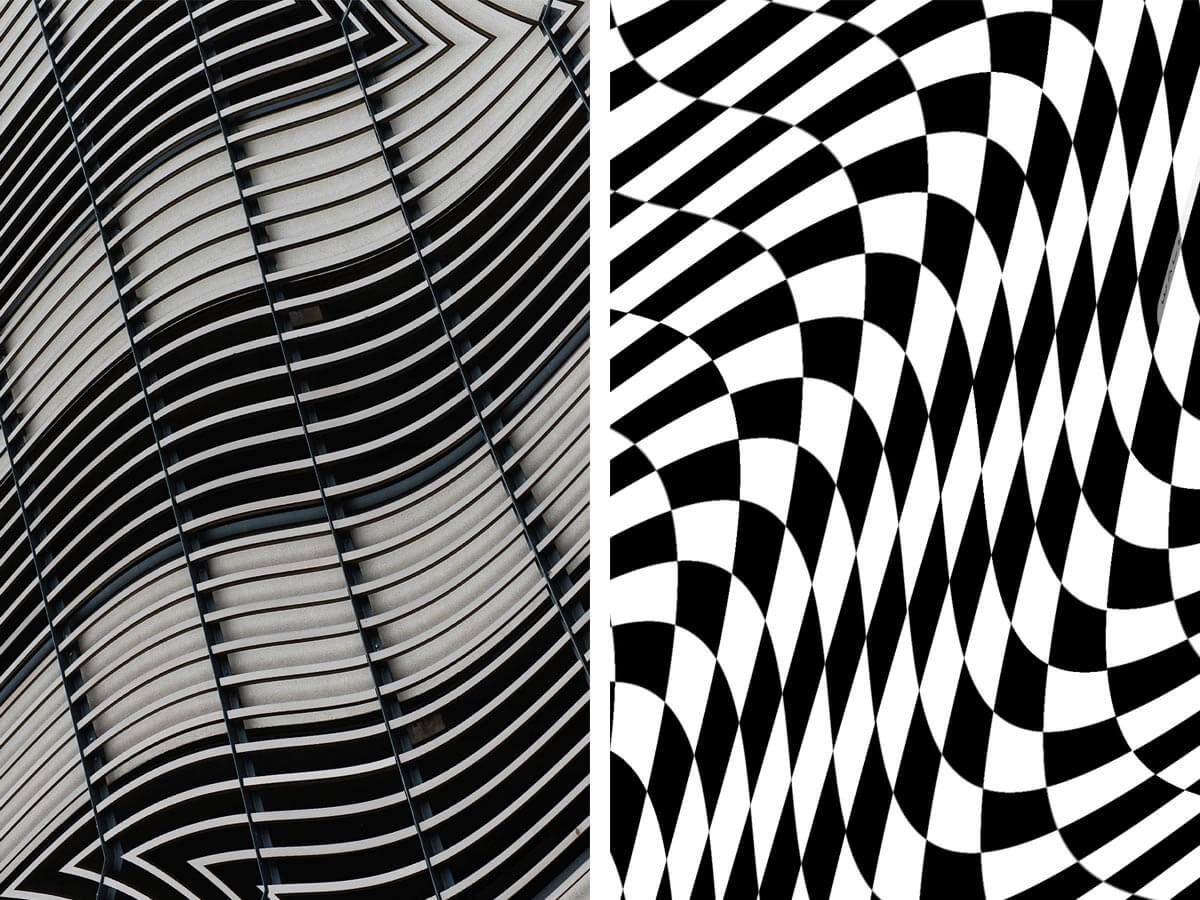
This is where your creativity comes into play. There are three types of Wave effects to choose from: Round, Triangle, and Square. Don’t forget to customize the Amplitude, Scale and Rotation using the adjustment sliders! It will give you different unique looks, play around with it to find what looks best.
For our image, we figured it would look best in Square.
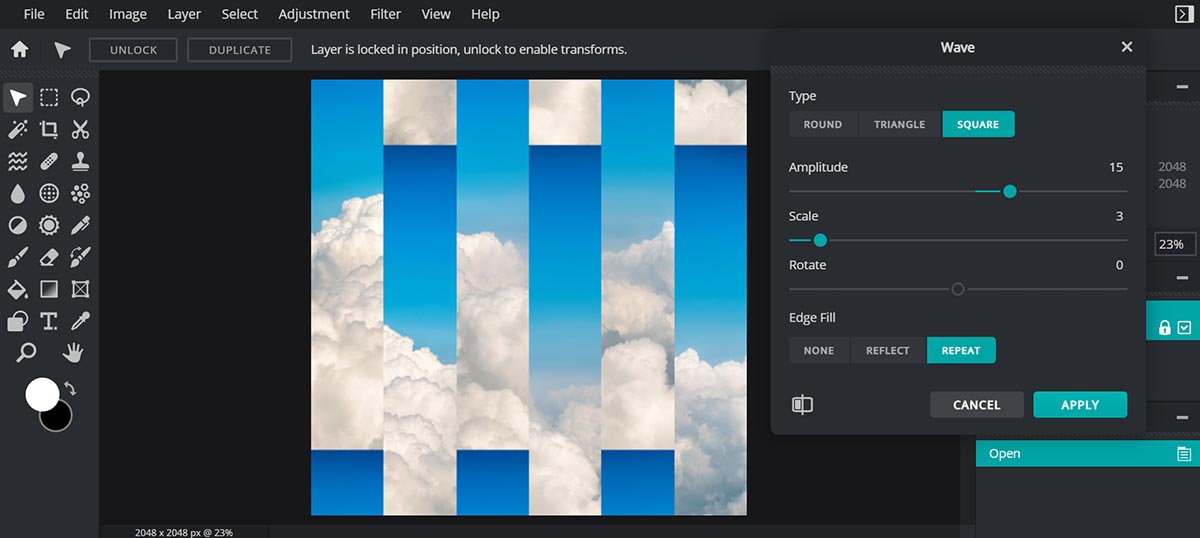
After playing around with the adjustment sliders, we decided to go with this. (+13 Amplitude, +3 Scale and we did not touch the Rotate slider.
(But, for illustration purposes. Here’s what the Rotate slider can do!)

Below the sliders, you can choose how you want to fill the edges. (Of course, we named it Edge Fill.) For our edges, we’ve selected Repeat to add a form of continuity and cohesiveness.
When you’re done with your look, hit Apply.

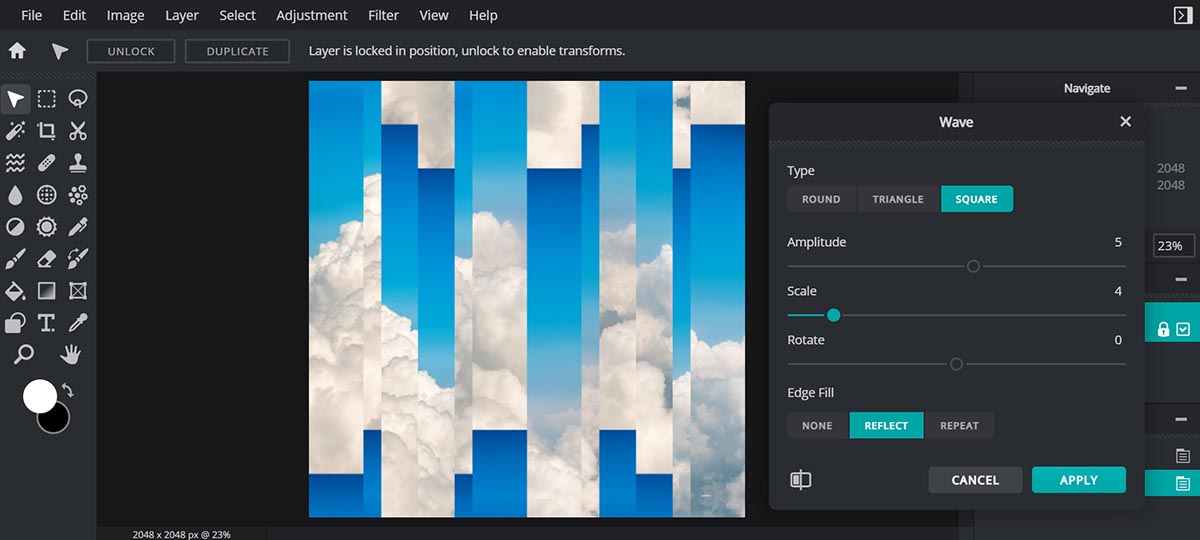
Step #3: Add another layer of the Wave effect
This step is optional. If you’re already satisfied with your edit, you can go ahead to the next step.
But, we’re not 100% satisfied with this yet. So, we’re going to go ahead and pile on another layer of the Wave effect. This time, we’re tuning up a little bit of the Amplitude and going harder on the Scale. (+5 Amplitude, +4 Scale)
As for the Edge Fill, we’re choosing Reflect instead of Repeat, for a slightly more blending effect.
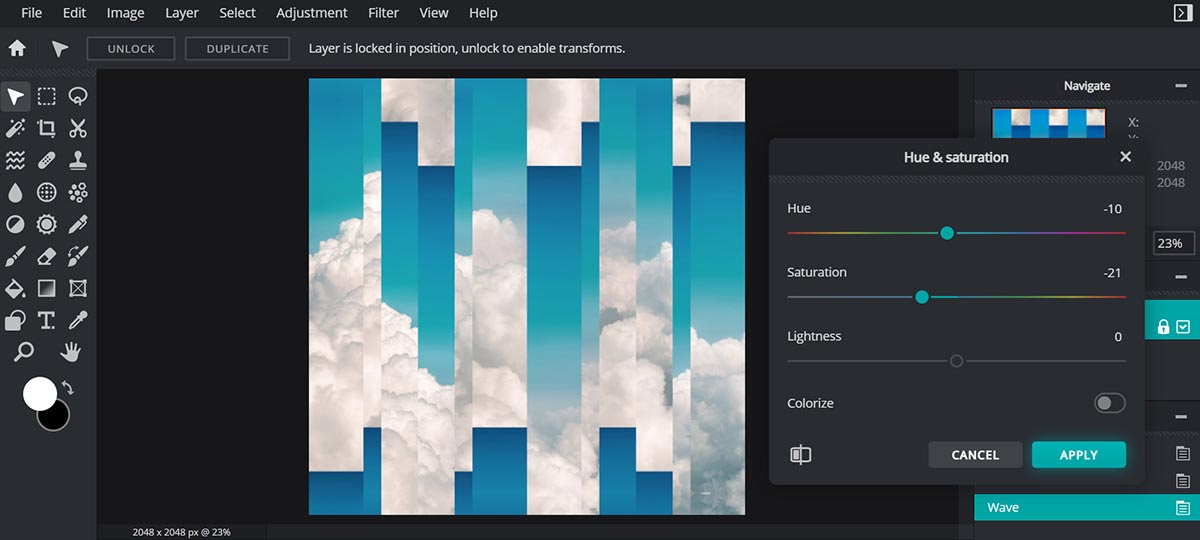
Step #4: Polish and Perfect It
The last part, and the one we’re all most familiar with: do the touch ups (saturation, contrast, etc. You know the drill).
For this photo, we moved the slider to a greener hue, reduced the saturation, and adjusted the temperature. These edits can all be done by clicking on Adjustment on the top bar. Then, there will be a drop-down bar with many options to choose from.
That’s it! Wasn’t that quick and easy? The results are also glorious.
Here’s a quick before and after:

What do you think?
There are so many different styles you can achieve with our new Creative filter. Here are some more examples below!
Go ahead and try it out right now at Pixlr E Don’t forget to have fun, explore and you might come up with something out of this world!
Article written by Ashley Yeong