Dystopian surreal artwork is a type of art that creates a sense of unease and confusion in the viewer. It often features distorted, futuristic landscapes, and twisted, surreal imagery that is reminiscent of a world gone wrong.
With the advent of AI image generators, creating dystopian surreal artwork has become more accessible than ever before.
Pixlr 2023’s new AI Image Generation tool uses cutting-edge AI technology to generate unique images and graphics in real-time, based on your input and preferences.
You just need to type in keywords and prompts to your liking, and the AI Image Generation tool will generate a custom image or graphic that meets your specifications, and you’re free to edit it however you want on Pixlr immediately. In this blog post, we will explore how to create a dystopian surreal artwork using Pixlr’s AI image generator.
1. Generate an image with Pixlr’s AI Image Generator

First things first, head over to Image generator on Pixlr. Here you’ll be asked to key in a prompt which describes your image. Additionally, you can select a few predefined keywords at the bottom suggesting the type of medium, style, output, and attributes of your desired image.
For this tutorial we will be using the prompts “Dystopian city street, hyper realistic, steampunk, cinematic shot, highly detailed, dramatic”.
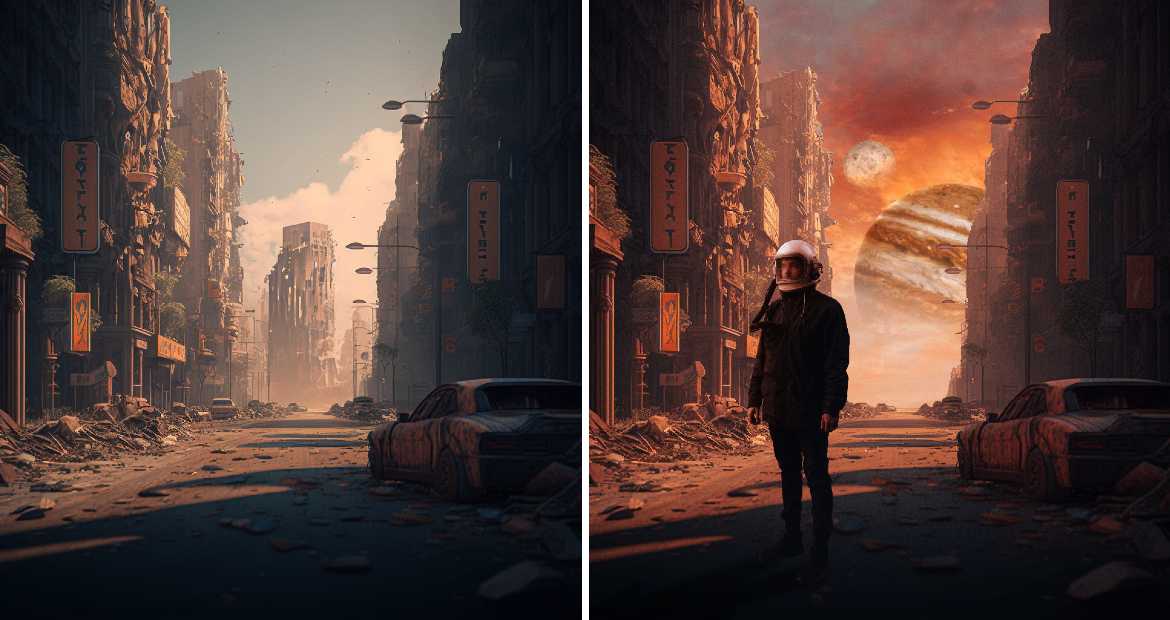
(Left) Image generated via Pixlr’s Image generator (Right) Edited Artwork #madewithpixlr
2. Remove the background
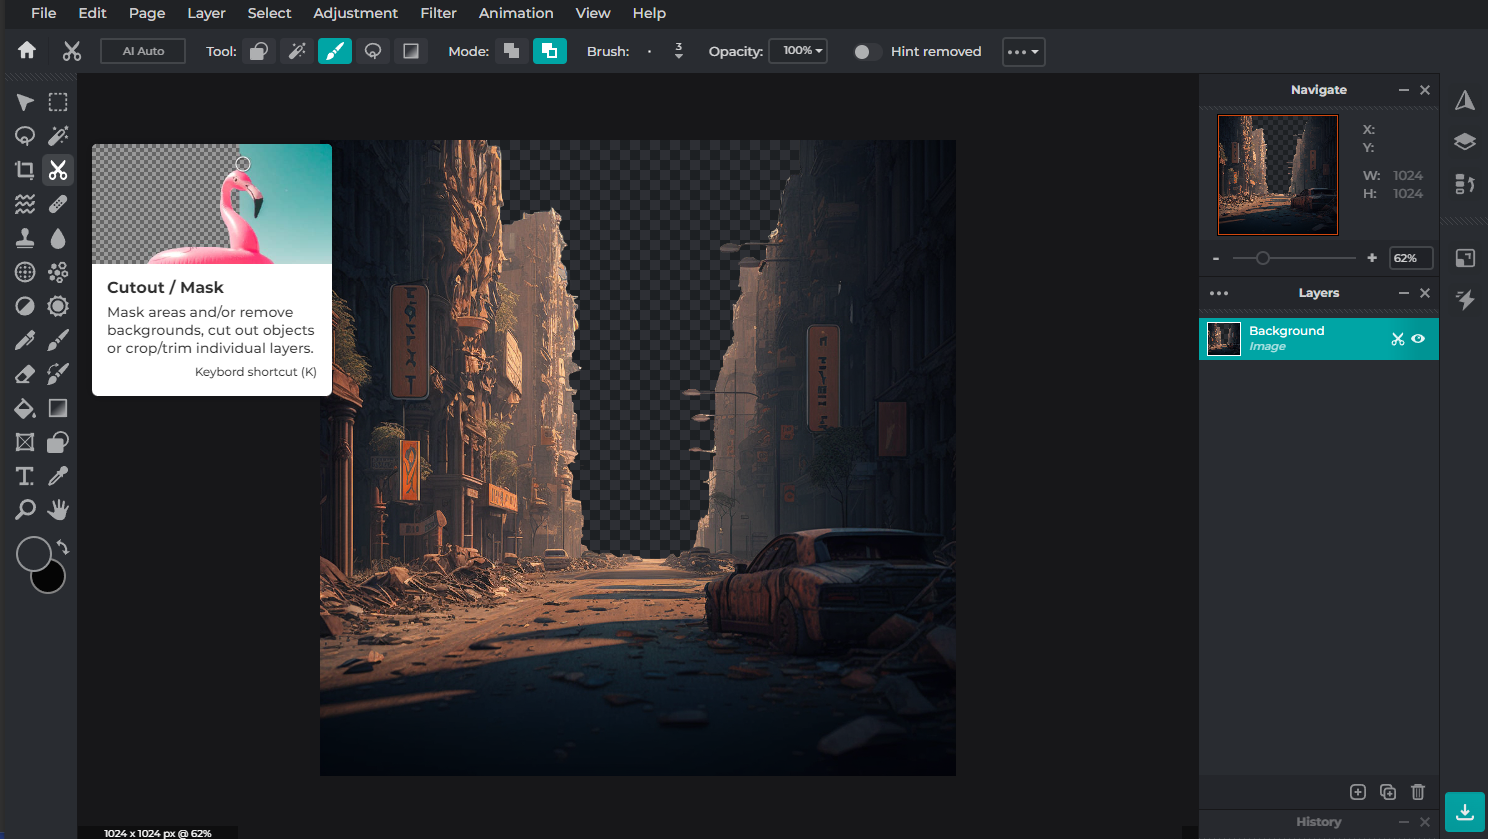
Once you’ve successfully generated your desired image, use the Cutout/Mask tool to remove its background. Use the Lasso Mask tool to remove large areas, and the Draw Mask tool to clean up the rough edges so that it’s ready for photomanipulation.
3. Add a new sky background
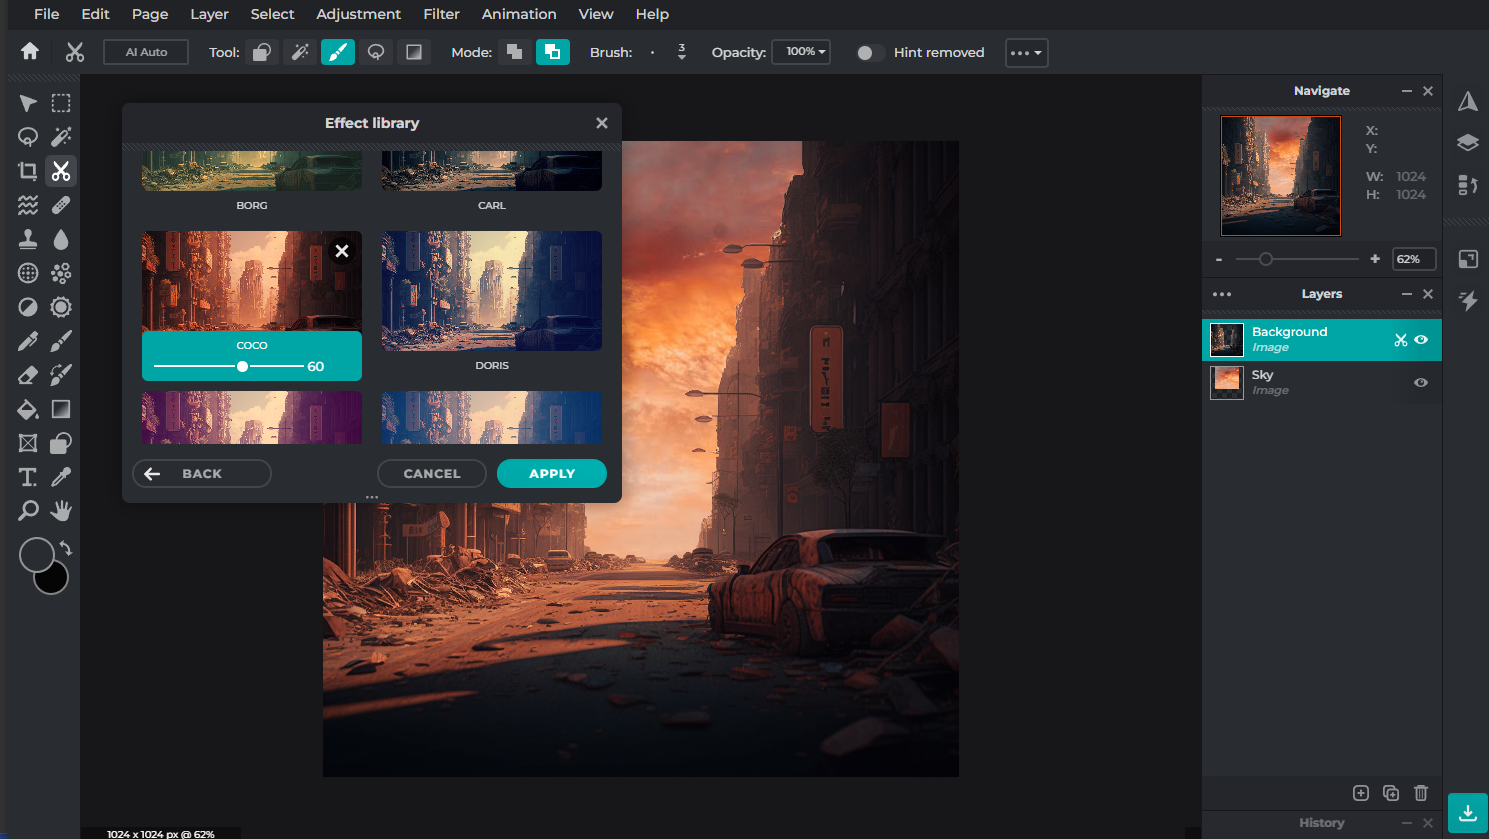
Add an image of a sky and place it on the layer underneath the city street image. Remember, you can always generate the sky image using Pixlr’s AI Generator too!
Next, use the Filters and adjust accordingly so that the sky matches the tone of the city streets layer. In this case, we used the Coco filter under Instage filters because the orange hues suit the overall tone of the image.
4. Add a subject image
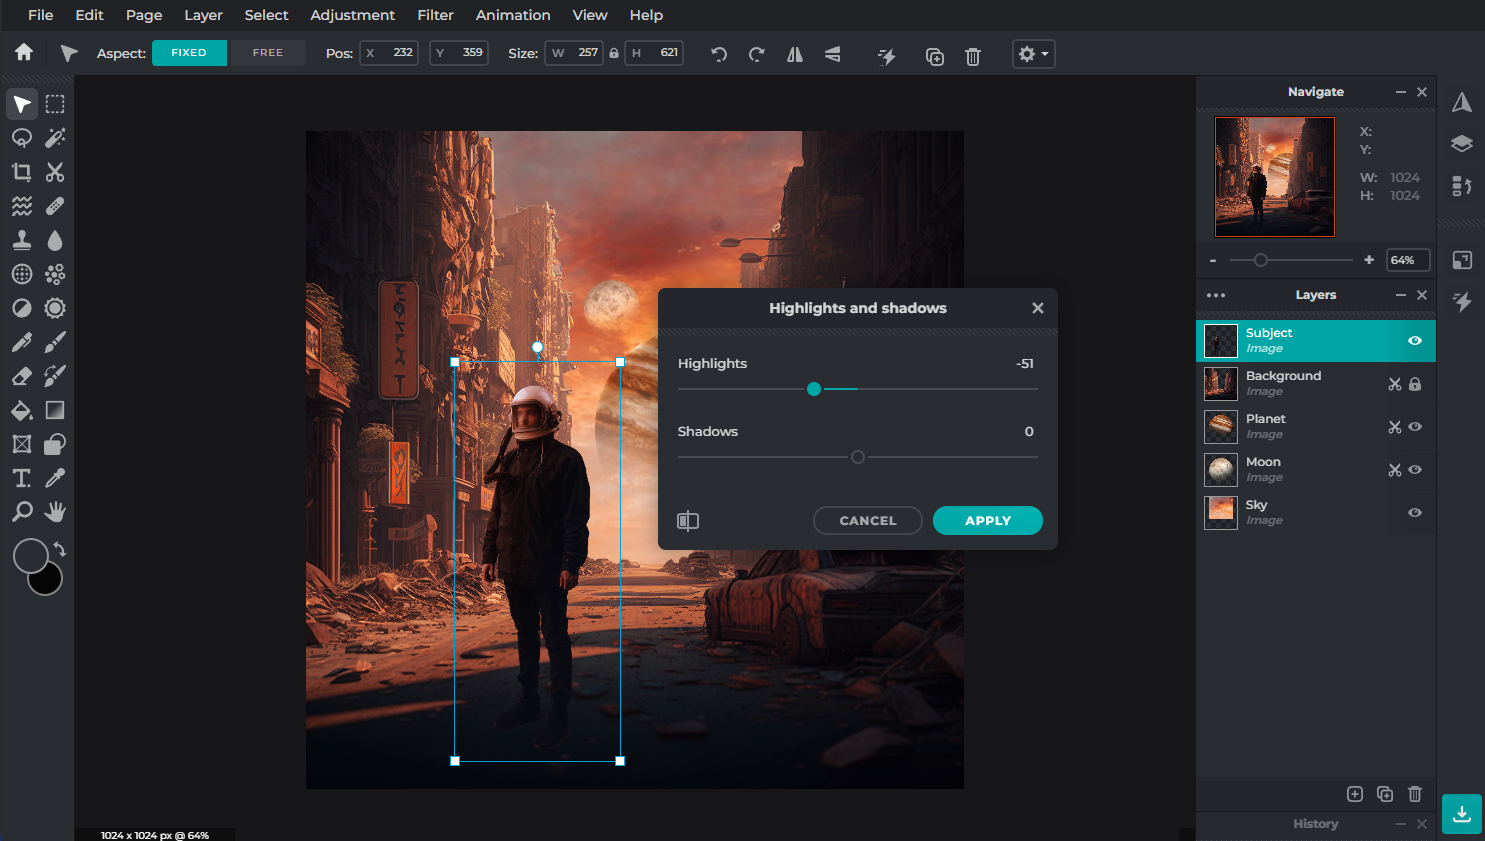
Add another image on top of the city streets layer, and use the Cutout/Mask tool to remove its background as well. For this tutorial, we used a man wearing a helmet. Additionally, you can insert more images for additional details like we did with the planets in the background.
Similarly, Use Filters and Adjustments to match the color tone and lighting of the subject’s layer with the background.
5. Add some shadows
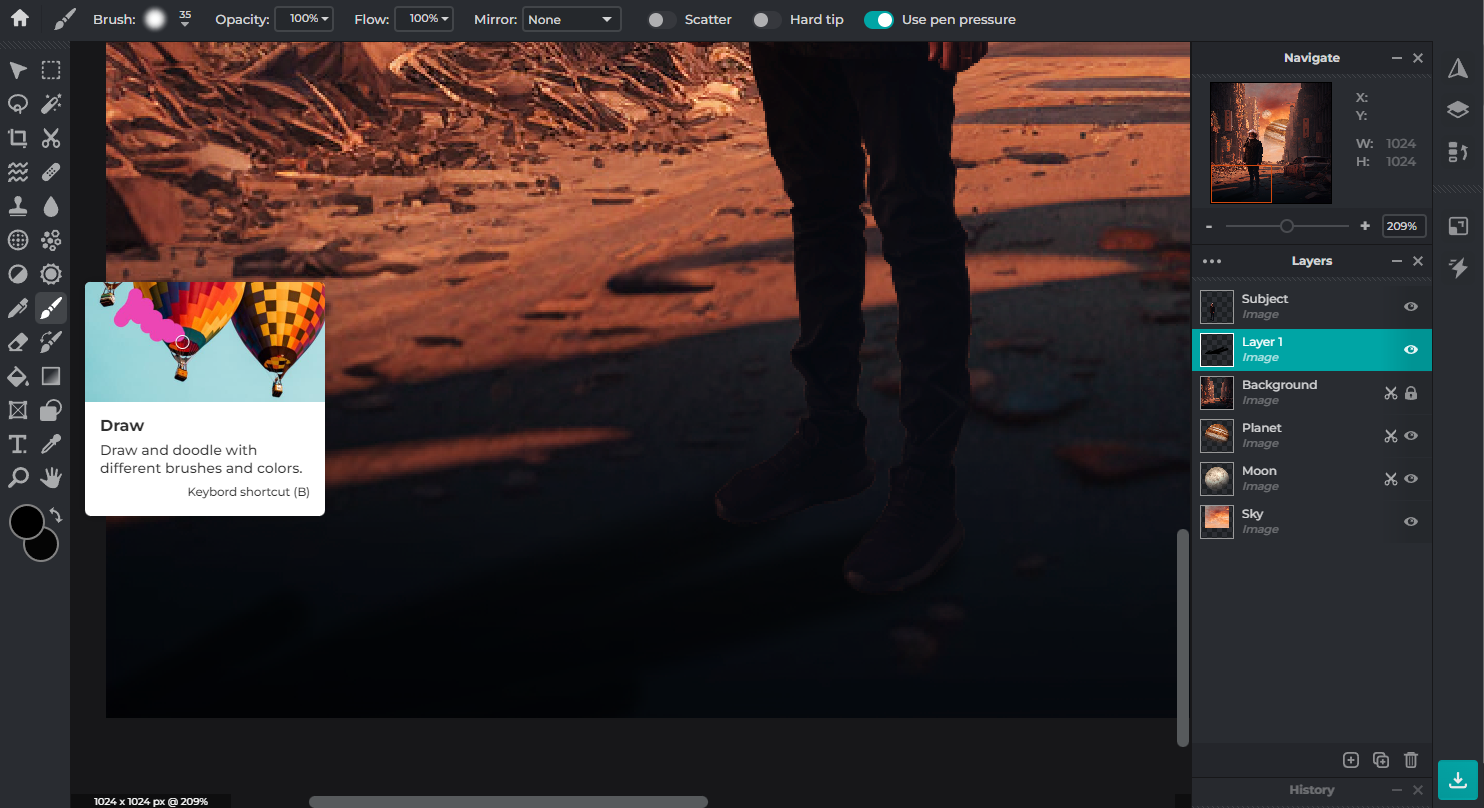
On a new layer, add some shadows behind the subject using the Draw tool on medium softness (we used 50 softness). Adjust the opacity according to the lighting so that it gives a more realistic feel to the edit. The purpose of this is to show that the subject naturally belongs to the background.
6. Add some Grain for a final touch
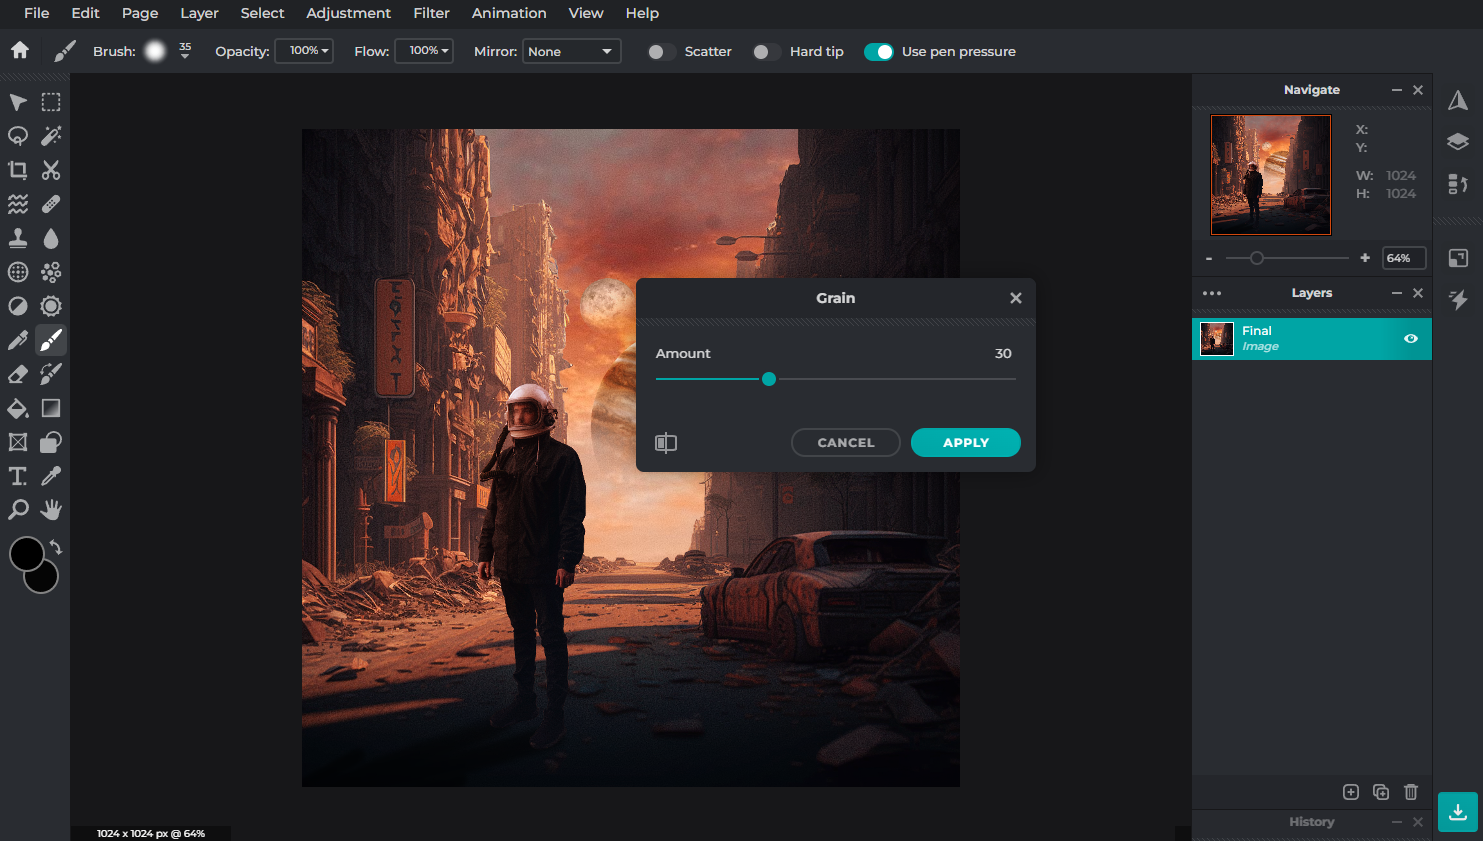
Once all the layers have been finalized, merge them together. Then add some Grain by clicking on Filter then selecting Details. The grainy effect will help to blend the layers together and hide small imperfections from the masking, making your overall edit look more clean and natural.
And that’s it! Congratulations on creating your very own dystopian surreal artwork!
Get creative with Pixlr 2023’s AI-powered Image Generator, today!
Long gone are the days of having to search for specific elements and images on the Internet, and having to shift between multiple tabs while editing. Pixlr 2023’s AI Image Generation tool allows you to express your imagination and creativity seamlessly.
Share your work with us on social media by tagging @Pixlr on Facebook and Instagram – we’d love to see what you can create with Pixlr!